Create a Web Application in SharePoint 2010 using Claims Based authentication
SharePoint 2010 supports two types of authentication modes. Classic Mode and Claims based. Classic mode supports only windows authentication, where in case of Claims based authentication you can use any of the supported authentication methods such as windows authentication, forms based authentication (LDAP, SQL Server, custom) and SAML token based authentication.
Read this MSDN article, for understanding more about SharePoint authentication modes http://technet.microsoft.com/en-us/library/cc262350.aspx .
When you create a web application you have the option to select the required authentication mode. If you choose classic mode initially, in future you can switch to Claims-based. If you choose Claims-based, you cannot switch it to classic mode. In this article, I am going to mention the steps required to create a web application in SharePoint 2010 using Claims-based authentication that supports both windows authentication and form authentication.
From the SharePoint Server, browse the Central Administration website, under Application Management, click on Manage web applications.
In the web application management page, click on the new icon to create a new web application
The new web application dialog will appear. Make sure you are selecting authentication mode as Claims based. Select a port and give a name for your web application.
Modify the values for “Allow Anonymous” and “use secure socket layer” settings as you required. Leave it as default if you don’t have any specific requirements. For public facing websites, you need to set Allow Anonymous to true.
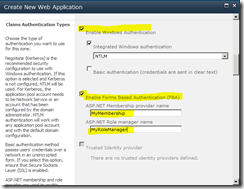
In the Claims Authentication Type, make sure enable windows authentication is selected. Click on enable form authentication check box, and provide a membership provider and role manager.
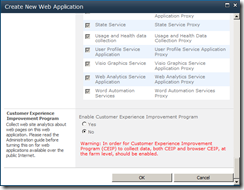
Scroll down till the end of the dialog and click OK. If you want you can change the settings such as application pool name, database name etc. This is not necessary, but maintaining conventions while deciding names will help you in long run.
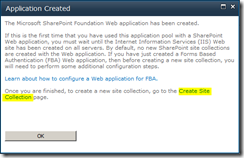
Click ok to create the web application. Now an IIS website will be created by SharePoint. Once successfully created, you will see the below message.
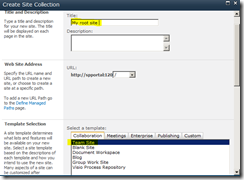
In order you to browse your web application created, you need to create a site collection under it. Click on the Create Site Collection link to create the site collection. In the create site collection dialog, enter a title, and select a template for the site. (Make sure you select the correct template as you required.)
Scroll down and click ok to create the site collection. Upon completion, you will see the below message.
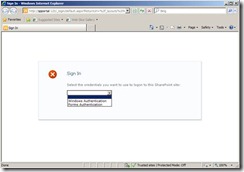
Click on the web application link or type the web application url in the browser address bar. If you didn’t enable anonymous access while creating web application, you will see the login page that allow you to select both windows authentication/ form authentication (If you enabled anonymous access, use the following url to authenticate, http://servername:port/_layouts/authenticate.aspx).
You will see the below login page that allows you to use any of the authentication types either windows/ forms based authentication.


