Installing SharePoint 2013 on Windows 2012- standalone installation
In this article, I am going to share my experience while installing SharePoint 2013 on Windows 2012. This was the first time I tried SharePoint 2013. So I thought sharing the same will benefit somebody who would like to install SharePoint 2013 as a standalone installation. Standalone installation is meant for evaluation/development purposes. For production environments, you need to follow the best practices and create required service accounts. Microsoft has published the deployment guide for SharePoint 2013, you can download this from the below link.
http://www.microsoft.com/en-us/download/details.aspx?id=30384
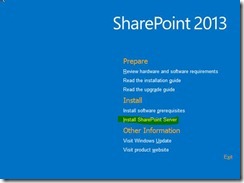
Since this is for development environment, I am not going to create any service account, I logged in to Windows 2012 as an administrator and just placed my installation DVD on the drive. When I run the setup from the DVD, the below splash screen appears.
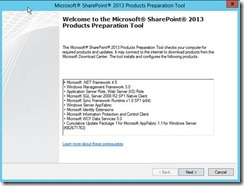
This reflects the new UI changes happening with all Microsoft based applications; the interface matches the metro style applications (Windows 8 style). As you can see the options are same as that of the SharePoint 2010 installation screen. Click on the “install software prerequisites” link to get all the prerequisites get installed. You need a valid internet connection to do this. Clicking on the install software prerequisites will bring the following dialog.
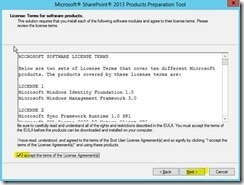
Click Next, you will see the terms and conditions. Select I accept check box and click Next.
The installation will start immediately.
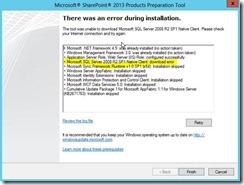
For any reason, if you stop the installation and start it later, the product preparation tool will check whether a particular component is installed and if yes, then the installation of that particular component will be skipped. If you do not have internet connection, you will face the download error as follows. At any point of failure, the error log will be available for you to review.
If all OK, you will reach the below dialog, this means some components will be installed once the PC is rebooted. Be noted that the clicking on finish will not ask you for further confirmation. So make sure to save all your work before clicking on finish button.
Once the server is restarted, the product preparation tool will start automatically and you will see the following dialog.
Now go to the SharePoint 2013 splash page and click on “Install SharePoint Server” link.
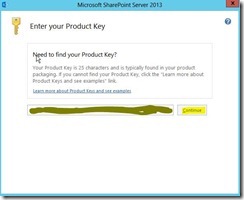
You need to enter the product key here. Enter the product key as you received and click continue.
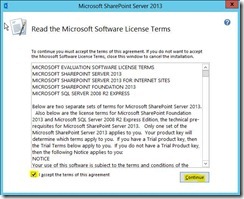
Select the Checkbox for the license agreement and click on continue button.
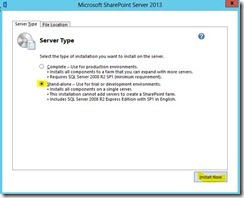
Now you need to select the installation type. Select Stand-alone and click on “Install Now” button.
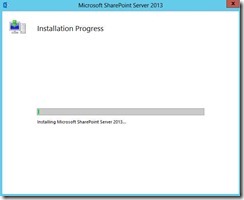
A dialog will pop up that updates you with the process and progress.
The installation took around 15-20 minutes with 2 GB or Ram installed in the server, seems fair. Once the installation is over, you will see the following Dialog. Make sure you select the Run the products and configuration wizard.
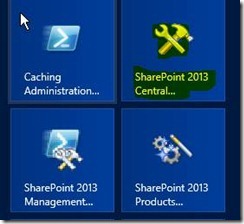
If you miss to select the check box, you can find the products and configuration wizard from the start tiles.
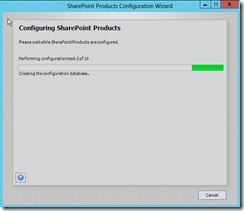
The products and configuration wizard will start. If you get any dialog saying some of the services will be stopped, you just accept it.
Since we selected standalone installation, it will not ask for any user input, as it already knows the database to be configured. Once the configuration is over without any problems you will see the configuration successful message.
Also you can find the link to central administration on the Start Screen.
Troubleshooting
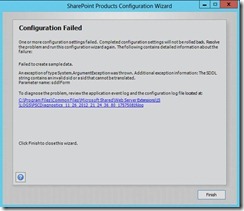
During my first setup process, I got the below error.
System.ArgumentException: The SDDL string contains an invalid sid or a sid that cannot be translated.
Parameter name: sddlForm
at System.Security.AccessControl.RawSecurityDescriptor.BinaryFormFromSddlForm(String sddlForm)
at System.Security.AccessControl.RawSecurityDescriptor..ctor(String sddlForm)
at Microsoft.SharePoint.Win32.SPNetApi32.CreateShareSecurityDescriptor(String[] readNames, String[] changeNames, String[] fullControlNames, String& sddl)
at Microsoft.SharePoint.Win32.SPNetApi32.CreateFileShare(String name, String description, String path)
at Microsoft.SharePoint.Administration.SPServer.CreateFileShare(String name, String description, String path)
at Microsoft.Office.Server.Search.Administration.AnalyticsAdministration.CreateAnalyticsUNCShare(String dirParentLocation, String shareName)
at Microsoft.Office.Server.Search.Administration.AnalyticsAdministration.ProvisionAnalyticsShare(SearchServiceApplication serviceApplication)
…………………………………………
…………………………………………
The configuration wizard displayed the error as below.
The error occurred in step 8 of the configuration wizard and by the time the central administration is already provisioned. So from the start, I was able to open the central administration website, but the search service application was showing as error.
I found a good blog that specifies the reason for error.
http://kbdump.com/sharepoint2013-standalone-config-error-create-sample-data/
The workaround specified in the blog works fine. I think SharePoint must be provisioning Search using the Network Service account, so instead of giving permission to everyone, you could try giving permission to Network Service account(I didn’t try this yet, buy you could try and post your feedback here). In production environment you will have specific accounts that have access rights as recommended by Microsoft guidelines.
Installation of SharePoint 2013 is pretty straight forward. Hope you enjoyed the article!

