WalkThrough: aspnet_regsql.exe in ASP.Net 4
ASP.Net has the built-in support for Membership. Using this, you can securely store and validate user credentials. By using Membership along with Roles and Profiles you can build powerful applications. ASP.Net has a set of classes that allows you to access the Membership and Roles functionality. You can get complete reference of these classes from the below link.
http://msdn.microsoft.com/en-us/library/91f66yxt.aspx
Asp.Net membership stores the membership data in the SQL Server database. So in order to start working on a project that uses the membership, you need to install the membership schema (nothing but, some tables and stored procedures) in your database. Once you have the database schema available, from your application, you can manage the users/roles/profiles from your code.
In this walkthrough, I am going to create a database schema for asp.net membership. Before doing the same, Make sure you have ASP.Net installed.
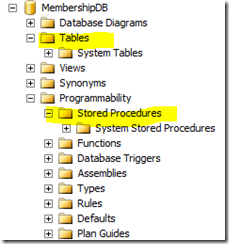
First create a database for installing membership database schema. In this walkthrough, I am assuming you have created a database named “MembershipDB”. The snapshot of the database in management studio is as follows.
As you notice there are no tables and stored procedures available as I just created this DB.
There is a powerful tool shipped with ASP.Net to create membership schema in your database; “aspnet_regsql.exe”. This tool is located at <windowsDirectory>\Microsoft.Net\Framework\<version>\ folder. If Windows installed in C drive, you can find the path for the tool in .Net 4 as below.
C:\Windows\Microsoft.NET\Framework64\v4.0.30319
See the snapshot of the folder in windows explorer
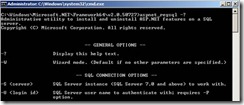
Open a command prompt and change the directory to the mentioned folder. Type aspnet_regsql in the command prompt and press enter.
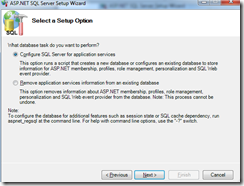
This will open the SQL registration wizard.
Click next
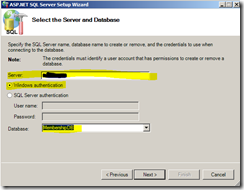
Make sure configure SQL server for application services has been selected. Now you need to select the database to install the membership schema
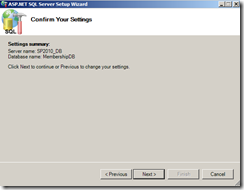
Select your database and click next. A confirmation screen will appear.
Click next.
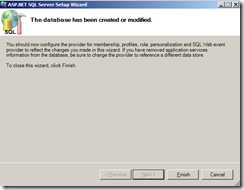
Click finish to exist the wizard.
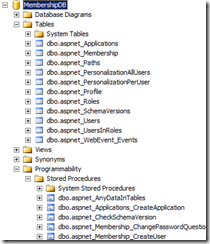
Check in the database, you will see, Membership tables and stored procedures are created.
The wizard is useful and easy. But it has some disadvantages, you cannot install individual features, for example, if you want to install only Membership and Roles, you cannot achieve this with the wizard. Also normally administrators prefer command line. aspnet_regsql can be executed in command line mode. The following are the important parameters supported by aspnet_regsql tool
Parameter
Description
-E
Authenticate with current windows credentials.
-S
SQL Server instance.
-d
Database name, where the membership to be installed.
-C
Connection string, in this case you doesn’t need to specify server instance separately
-A all|m|r|p|c|w
A denotes add, other keys can be used in combination. For e.g. if you want to install membership and roles, specify
-A mr
The supported options are
all – All the available features
m – Membership
r – roles
p – profiles
c- personalization
w – SQL web events
-R all|m|r|p|c|w
Remove a particular feature.
-?
List all the options.
Find some examples.
1. Remove all the services installed in a SQL instance
Command: aspnet_regsql.exe -E -S sp2010_db -R all -d MembershipDB
The command will ask you a confirmation, you need to enter y for confirming. If you check your database now, you will see the tables and stored procedures are removed from database.
2. Add membership and roles
Check the database and you will see only membership and roles specific schema is installed in db.
3. List all the available options for the command
Be noted that the parameters are case sensitive. aspnet_regsql.exe is a great tool that helps developers to create database schema in no time. Normally developers need some data in the database to start the development. You can add users and roles to the Membership database by using any of the two methods.
1. ASP.Net Website Administration Tool
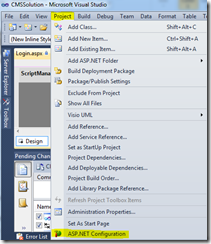
You can launch web administration tool from the Visual Studio project, under the project menu.
This tool will connect to the database defined in the machine.config with connection string name “LocalSQLServer”. If you want ASP.Net configuration tool to connect your custom database, add a connection string to your web.config with name “LocalSQLServer” that points to your database. Make sure you use <clear/> or <remove> element to clear the definition for LocalSQLServer inheriting from machine.config. See snapshot of connectionstring that will work with ASP.Net configuration.
2. Using SQL queries
You can execute queries directly against the SQL server database to create users and roles. See the queries that can be used.
--*****Query to create user in membership *****--
declare @now datetime
set @now= GETDATE()
exec aspnet_Membership_CreateUser 'FormAuthApplication','admin1','pass@word1', '','admin1@contoso.com','','',1,@now,@now,0,0,null
--This will create username admin1 with password pass@word1 and an application named “FormAuthApplication”. You can create any number of applications and each applications can have its own users in the database. You need to mention the same application name in all the related queries.
--*****Query to create role in membership db *****--
--Create Role
EXEC aspnet_Roles_CreateRole ' FormAuthApplication', 'Admin'
--this will create a role with Admin in the database
--*****Query to add user to role in membership db *****--
EXEC aspnet_UsersInRoles_AddUsersToRoles ' FormAuthApplication', 'admin1', 'Admin', 8
--this will add the user admin1 to the role Admin
Creating membership based applications is easy and you can use Membership along with form authentication to create user authenticated applications.
