Web API - Documentation & Testing
ASP.Net Web API is a framework for building HTTP Services. ASP.Net Web API makes it easy to write Restful applications on the .Net framework. Writing HTTP services is part of almost every developer’s job.
For most of the developers who develop HTTP services, it is sure that some other developers are going to consume the services. When you are in a project where you write services and consumer applications in parallel, lot of time spend on documentation and communication between the teams. If the teams are in different geographical locations, the time spend on the documentation/communication increases.
I have seen many developers write client applications just to test their API, before publishing it to test / staging environments. They are just spending time on writing test clients to test various operations offered by their HTTP Service.
Now with Web API, it is quite easy to handle the documentation & Testing without spending much time on it. This must be interesting for service developers as they can concentrate more on your services and business logic, instead of always worries about the documentation and testing.
In this article, I am going to explain how you can create a Web API 2 with documentation and test client. I have used Visual Studio 2015 with C# as the programming language.
Create Web API
Launch Visual Studio 2015, go to file -> new project, in the New Project dialog box, select Visual C# and under web tab, select ASP.Net Web Application, I named my application as “TestableAPI”.

Once you are done Click OK. Visual Studio will ask you the template you want to start with. Since I am trying to demonstrate the documentation & testing capabilities, I just want an empty project with Web API references added. I have chosen Empty as my project template, selected Web API check box for references and change the authentication to “No Authentication”.

The created Web API looks as follows in the solution explorer.

In real life, you may add your models to the project then add the corresponding API controllers. Since we are discussing about the documentation/testability, let us add an empty API Controller for the project.
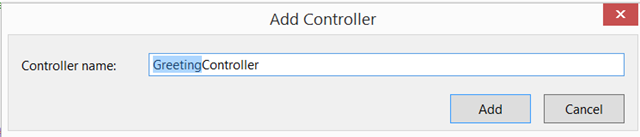
Right click the Controller folder, select Add -> Controller, select the template “Web API 2 Controller –Empty” and then click on the Add button

For the purpose of this walkthrough I am going to add a Greeting Control that have some methods/actions to greet a particular user.
The Web API controller is created. I am going to add two actions, the first one that accepts a user and return the greeting based on the system time. The second action will accept a name, the hour of day and return the greeting message based on the hour. The completed Controller code is given below

The purpose of this article is not to evaluate whether the GreetMessage logic is ideal or not, instead let us look into the Web API artifacts. One thing you will notice is that I am defining routes for both actions. Though this works, in real life scenarios, it is better to define the route in the WebApiConfig.cs file. By defining routes in one place increases the maintainability of the project.
Now Let us focus on the problem we are trying to solve. Basically we need to address the below two issues that every developer needs to address
- Documentation
- Test Client
Documentation
The first step in generating the documentation is adding XML Comments to your controllers and actions. XML Comments are out there for years to support the documentation. Couple of years back, I published an article about documenting a C# library, with the help of XML documentation. You can read it from http://weblogs.asp.net/sreejukg/documenting-c-library-using-ghostdoc-and-sandcastle
Once you enabled the documentation, you need to ensure to select the XML documentation file generation from the build properties of your project. From solution explorer, right click your project and select properties. Now in the Build menu, make sure you have selected the checkbox associated with XML documentation file.

You can use GhostDoc or any other Visual Studio extension to generate XML comments. Basically you can do this without using any tool too, but the tools will dramatically reduce your efforts. I have added the comments with the help of GhostDoc. Now the controller looks as below.

The next thing we need to do is to generate Help documentation from these XML comments. Luckily Microsoft has released a Nuget package for this purpose. You can refer the package from the link https://www.nuget.org/packages/Microsoft.AspNet.WebApi.HelpPage/
I have installed the HelpPage package from the package manager console. In Visual Studio you can open the package manager console from Tools -> Package Manger

Once the package is successfully installed, you can see the Areas Folder, where the HelpPage components are added.

You are not done yet! We need the help pages to read the documentation from your comments, right. In order to do this, you need to ensure Visual Studio generates the XML file while building your application. Right click the project in solution explorer click on properties, go to the Build tab, you can see “XML documentation file” check box, make sure you select this.

Now you need to configure the help page to read from the generated XML file. Open the HelpPageConfig.cs find under Areas -> App_Start -> HelpPageConfig.cs, by default the HelpPageConfig.cs looks as below.

Just uncomment the config.SetDocumentationProvider method and update the path to your XML as per the build configuration. The modified method is given below.

We are almost there! Let us enable the users to browse the documentation. Basically we need to register the Help page. Open WebApiConfig.cs file from the App_Start folder, In the register method, call RegisterAllAreas() method. See the modified webapiconfig.cs file

Now build & run the application and browse to “/help”, you will see the documentation in the browser.Cool!

Test Client
Now we have the documentation, what is next? I need to test my APIs. In our case the service methods are all HttpGet and is easy to test in the browser by entering the url. But what if the methods are with HttpPost or other verbs, Definitely we need an effective way to test. There are couple of Nuget packages available for this, you can find one from the link https://www.nuget.org/packages/WebApiTestClient/
The Nuget packages are maintained with high level of documentation. The author of the package already wrote a good blog in MSDN. You can read it from the below Uri.
Ok. Let me install it from the package manager console. The command is
Install-Package WebApiTestClient

Note:- There are some other packages available in Nuget that serves the same purpose. To be honest with you I didn’t test them all, but you can try them.
Now once the WebApiTestClient package is installed, you will have the following files created in the solution.
- Scripts\WebApiTestClient.js
- Areas\HelpPage\TestClient.css
- Areas\HelpPage\Views\Help\DisplayTemplates\TestClientDialogs.cshtml
- Areas\HelpPage\Views\Help\DisplayTemplates\TestClientReferences.cshtml
Now the only thing left is to call the API methods from the Help pages.
Open the file Api.cshtml from Areas -> HelpPage -> Views-> Help

By default the API.cshtml have the below code.

To the end of this file, Add the following
@Html.DisplayForModel("TestClientDialogs")
@Html.DisplayForModel("TestClientReferences")
The blog post from the author recommends to add the second (TestclientReferences) in a script section, but its worked for me without that. The modified api.cshtml is given below

Now let us browse the help page, and when I select any method/action details, there is a button for testing the API, great!

Click on the TestAPI button, you will be allowed to pass the parameters and test the service method.

Once you enter the parameter values, click Send and the Web API method will be called and you can see the response. This work for all HTTP methods such as HttpPost, HttpGet and so on.
I entered some sample values and clicked on Send, and immediately I am able to view the response.

It is good that you can achieve the documentation and test without doing much work. That’s cool and during the development process, the moment you add a service, other team members can view the service documentation and test them.