Creating and maintaining Orchard translations
 Many volunteers have already stepped up to provide translations for Orchard. There are many challenges to overcome with translating such a project.
Orchard is a very modular CMS, so the translation mechanism needs to account for the core as well as first and third party modules and themes.
Another issue is that every new version of Orchard or of a module changes some localizable strings and adds new ones as others enter obsolescence.
In order to address those problems, I've built a small Orchard module that automates some of the most complex tasks that maintaining a translation implies. In this post, I'll walk you through the operations I had to do to update the French translation for Orchard 1.0.
In order to make sure you translate all the first party modules, I would recommend that you start from a full source code enlistment. The reason is that I'll show how you can extract the default en-US translation from any source code enlistment. That enables you to create a translation that is even more up-to-date than what is currently on the site. Alternatively, you could start by downloading the current en-US translation. If you decide to do so, just skip the relevant paragraphs.
First, let's install the Orchard Translation Manager. I'm starting from a vanilla clone of the latest in the code repository. After you've setup the site, go into the dashboard and click on Gallery. Locate the Orchard Translation Manager in the list of modules and click "Install".
Once the module is installed, you need to enable its one feature by going into Configuration/Features and clicking "Enable" next to Vandelay.TranslationManager.
We're done with the setup that we need in order to start our translation work. We'll now switch to the command-line and to our favorite text editor.
Open a command-line on the Orchard web site folder. I found the easiest way to do this is to do a SHIFT+right-click on the Orchard.Web folder in Windows Explorer and to click "Open command window here". Type bin\orchard to enter the Orchard command-line environment.
If you do a "help commands" you should see four commands in the list that came from the module we just installed: extract default translation, install translation, package translation and sync translation.
First, we're going to generate the default translation. Note that it is possible to generate that default translation for a specific list of modules and themes by using the /Extensions: switch, which should facilitate the translation of third party extensions, but in this tutorial we're going to generate it for the whole of the Orchard source code.
extract default translation /Output:\temp
This should have created an Orchard.en-us.po.zip file in the temp directory. Extract that archive into an orchard.po folder under \temp.
The next step depends on whether you have an existing translation that you want to update or not. If you do have an existing translation, just extract it into the same \temp\orchard.po directory. That should result in a file structure where you have the default en-US translation alongside your own. If you don't have an existing translation, just continue, the commands will be the same.
We are now going to synchronize those translations (or generate the stub for a new one if you didn't start from an existing translation).
sync translation /Input:\temp\orchard.po /Culture:fr-FR
After this command (where you should of course substitute fr-FR with the culture you're working on), we now have updated files that contain a few useful flags.
Open each of the .po files under the culture you are working on (there should be around 36) with your favorite text editor.
For all the strings that are still valid in the latest version, nothing changes and you don't need to do anything.
For all the strings that disappeared from the default culture, the old translation will still be there but they will be prefixed with the following comment:
# Obsolete translation
Conveniently, all the obsolete strings will be grouped at the end of the file. You can select all those and delete them.
For all the new strings, you will see the following comment:
# Untranslated string
This is where the hard work begins. You'll need to translate each of those new strings by entering the translation between the quotes in:
msgstr ""
Don't introduce hard carriage returns in the strings, just stay on one line (your text editor should do some reasonable wrapping so this shouldn't be a big deal).
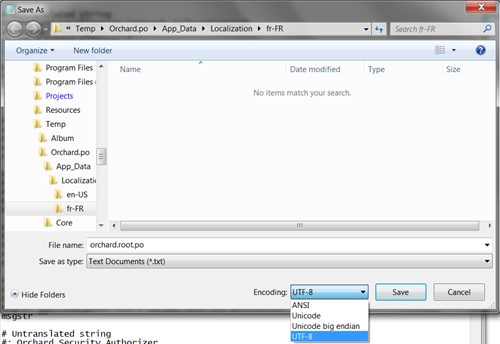
Once you're done with a file, save it. Make sure, and this is very important, that your text editor is saving using the UTF-8 encoding. In Notepad, that setting can be found in the file saving dialog by doing a "Save As" rather than a plain "Save":
When all the po files have been edited, you are ready to package the translation for submission (a.k.a. sending e-mail to the localization mailing list).
package translation /Culture:fr-FR
    /Input:\temp\orchard.po /Output:\temp
You should now see a Orchard.fr-FR.po.zip file in temp that is ready to be submitted.
That is, once you've tested it, which can be done by deploying it into the site:
install translation \temp\orchard.fr-fr.po.zip
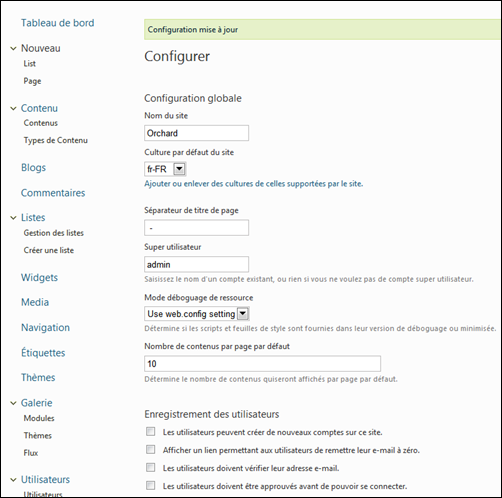
Once this is done you can go into the dashboard under Configuration/Settings and click on "Add or remove supported cultures for the site". Choose your culture and click "Add". You can go back to settings and set the default culture. Save.
You may now take a tour of the application and verify that everything works as expected:
And that's it really. Creating a translation for Orchard is a matter of a few hours. If you don't see a translation for your culture, please consider creating it.