How to install and configure Visual Studio Team Explorer
One of the challenging aspects of working with TFS as your source control system is very unfortunately the installation of the client software.
Over the past few years, I’ve been managing a number of small and large projects on CodePlex, and while the Subversion bridge has provided a much needed simple choice of client software, TFS remains its native protocol, which makes it still very much relevant to people who do a lot of work there.
But as I said, installing the client software may be challenging.
The first and main problem here is that Team Explorer, while free, comes in a very unfriendly format: an ISO image of the DVD. I asked the team why they made that weird and less than optimal choice, and apparently there are some technical reasons why a simple msi wouldn’t work. I wasn’t completely satisfied with the explanation (it’s still a bad customer experience) but at least there is hope as the plan is to make it a lot smoother with Visual Studio 2010.
So let’s download that thing. It can be found here:
Just click on the “Download” button and store the file in a local temporary folder. At 387.4 MB it’s a pretty big download (especially when compared with this) but it does contain the Visual Studio shell, which explains it, kind of. So you probably have time for a cup of coffee or two, trip to Seattle’s Best included.
Oh, by the way, to be clear, you do *not* need a version of Visual Studio on the box to install Team Explorer, it is a standalone application, but if you do have one, it will integrate with it.
Now that you have the IMG file, we can extract it. There are several options to extract or burn an ISO, but I’ll use a free one here. We won’t burn the image to a DVD (the only reason I could see why you’d want to do that is if you want to make multiple installs, but you might as well extract the ISO to a network share).
The free option I’ve selected is ExtractNow, which you can download from here:
Click on the “Download ExtractNow!” link on the bottom of the page and run the installer. When it asks you if you want to run it, say yes. The UI is a little weird: what you need to do now is right click on the white surface on the ExtractNow window and select “Add archive”: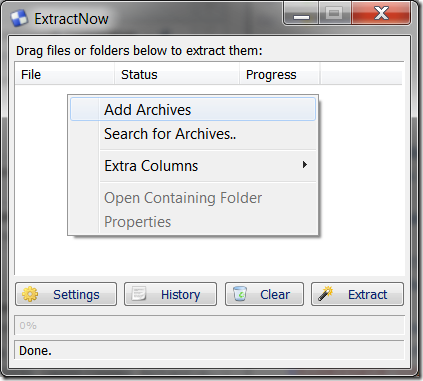 Then, navigate to wherever you downloaded the VS2008TeamExplorer.iso file, select it and click the “Open” button. Now click the “Extract” button and wait for the extraction to complete. You should now have a VS2008TeamExplorer folder next to the iso file. You can close ExtractNow and maybe even uninstall it until the next time you need it…
Open that folder and double-click “Setup”. Follow the instructions (the default settings should be fine) and wait for the install to complete. Fortunately, it doesn’t take nearly as long as installing the full VS.
Once this is done, you should be up and running. Let’s launch the shell and connect to a CodePlex project. From the Team Explorer window, click the “Add existing team project button: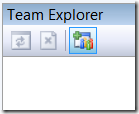
Click on the “Servers” button and then on the “Add” button to add the relevant CodePlex server. The data that you need to enter there can be found on the “Source Code” tab of your project’s site on CodePlex by clicking on Source Control Setup / Visual Studio Team Explorer (right side of the page).
You can copy the server, port and protocol information into the Team Explorer add server window: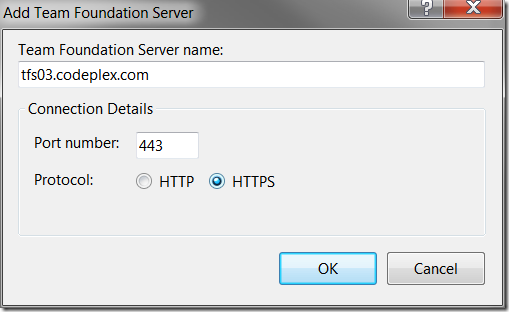
You can now close that window by clicking OK. You will then get prompted for your username and password. CodePlex also gave you that (notice the “snd\” domain prefix and “_cp” postfix) but let’s make sure that we only have to do this once. To that effect, let’s cancel and go to the Windows user account control panel and click on “Manage your credentials”: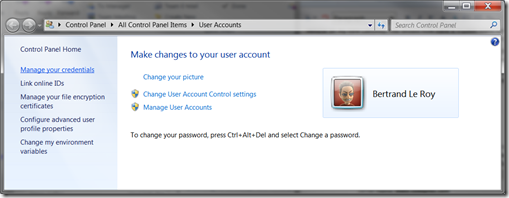
Then click on “Add a Windows Credential”. Copy there the server name, your username and your password: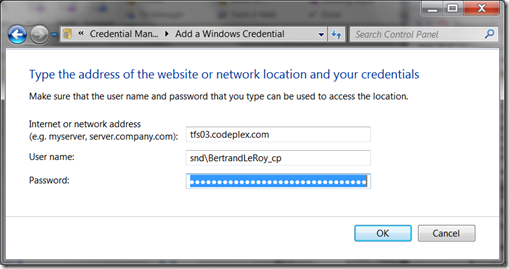
Click OK, then switch back to Visual Studio and click OK again. This time, you shouldn’t be prompted for credentials unless you made a typo in the above dialog. You may now click close and then select any number of projects you want to work with: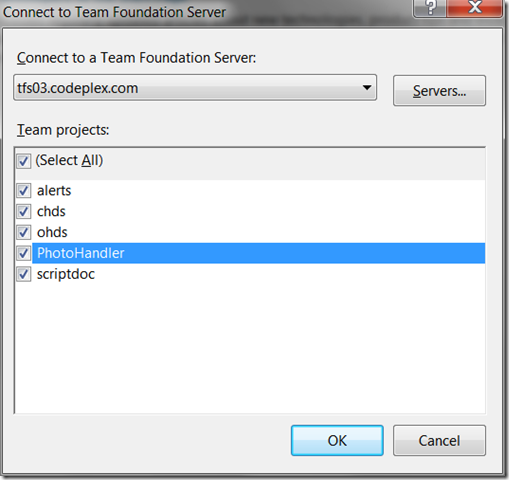
The team explorer window now shows the available projects: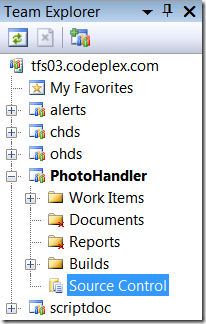
If you then double-click “Source Control” under any of the projects, you can explore the contents of the project and map them to a local folder. To do that, first create the target directory from Windows Explorer, then right click a project in the Visual Studio Source Control Explorer and select “Get Latest Version”: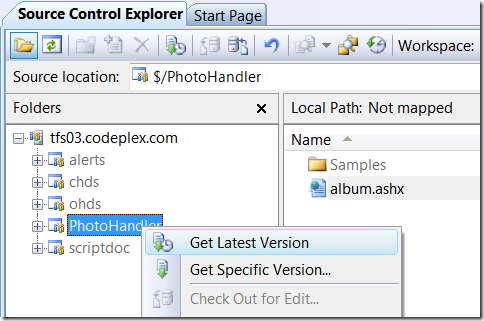
You will then be prompted for a local directory to which you want to map the source-controlled remote directory. Select the directory that you just created and click OK.
And… that’s it, you’re all set. You can now open any file or project from the locally mapped folder, check out code, modify it and then check it back in using the Pending Changes window.
I hope this helps.