VirtualAlbion using Deep Zoom and SeaDragon Ajax
Lionhead recently published a high resolution map of Albion (the world of Fable II in case you’re not into games). The map is pretty nice and very detailed. It’s a huge image (45.8MB, 16 megapixels) that they built for people to print and hang on their walls. When I saw that, I immediately thought how great this would work with Deep Zoom and SeaDragon Ajax. Of course, once we have virtually infinite zooming abilities, it would be even better if the map zoomed into detailed sub-maps of the various cities of Albion. Oh well, maybe they’ll do that eventually (or someone else will take on the task).
Anyways, I thought this was a great opportunity to show an end-to-end walkthrough of how I built that online version of the full resolution Albion map.
- Download the map file to local hard drive. Extract the TIF file from the zip archive.
- Download and install the Deep Zoom Composer tool.
- Run Deep Zoom Composer, click “new project”, name it “Albion”.
- In the Import tab, click “Add image…”:

- Navigate to the TIF file, select it and click “open”. Wait for the file to be imported.
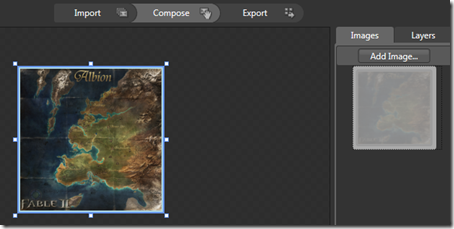
- Go to the Compose tab, drag the image and drop it onto the design surface (anywhere, it doesn’t matter as we’re only putting one image on the surface):

- Go to the Export tab, and click “Create a PhotoZoom account” if you don’t have one already. The alternative is to host the tile files yourself but the PhotoZoom option is by far the simplest.
Follow the instructions (they are really simple) and create an album from the web site and name it “Albion”. - Sign in using your LiveID account from the Composer application.
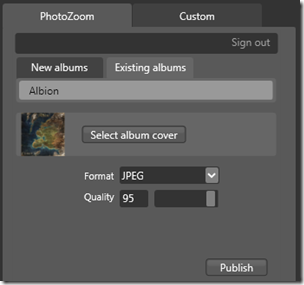
- Switch to “Existing Albums”, where you should see “Albion”, then click “select album cover” and click “OK” in the dialog that will open and that should contain only the map image. Click “Publish” and wait for the project to upload.

- Now comes the tricky part. I’ve asked the SeaDragon people to take a look as there is a step here that is far from optimal, apparently because a link that used to be on the album page was removed. All of the instructions under this step should be replaced with a simple copy and paste once this is fixed.
Navigate to the album’s page. The url should be something like
http://photozoom.mslivelabs.com/Album.aspx?alias=BertrandLeRoy&album=2
Now we need to find the url to copy and paste into the SeaDragon Ajax embedding page. Use the “View Source” command of your browser to get at the page’s source code. Look for the <object> tag. It should have a <param> tag named “initParam” that points to a url like http%3a%2f%2fphotozoom.mslivelabs.com%2fDZ%2f100%2f0%2fCollection%2fzece309bc8c7f465fbca8087784612173%2fcollection.xml. Copy this url into the address bar of the browser and decode it by replacing ‘%3a’ with ‘:’ and ‘%2f’ with ‘/’. The url I got out of that process was:
http://photozoom.mslivelabs.com/DZ/100/0/Collection/
zece309bc8c7f465fbca8087784612173/collection.xml
Press the return key to navigate to that url and again use the “View Source” option. You should see something like this:
<Collection MaxLevel="8" TileSize="256" Format="jpg" NextItemId="1" xmlns="http://schemas.microsoft.com/deepzoom/2008">
<Items>
<I Id="0" N="0" Source=
"../../Image/Col/zece309bc8c7f465fbca8087784612173/ffbbd46b-305f-4b8e-a745-522d1aa49b2f.xml">
<Size Width="4000" Height="4000" />
<Viewport Width="1" X="-0" Y="-0" />
</I>
</Items>
</Collection>
Copy the part between “Image” and “.xml”, close the browser tab and paste the url on the address bar, replacing the current url, starting at “Collection”. The resulting url should look something like this:
http://photozoom.mslivelabs.com/DZ/100/0/Image/Col/
zece309bc8c7f465fbca8087784612173/ffbbd46b-305f-4b8e-a745-522d1aa49b2f.xml
This is the url of your Deep Zoom image. Copy that url. - Navigate to http://livelabs.com/seadragon-ajax/embed-viewer. Paste the url of your Deep Zoom Image into the form field and press “Build Embed”.
- You can then modify the dimensions of the viewer (I chose 500px by 500px) and press “Build Embed” again.
- Copy the HTML code that appears below the viewer. This is the code you need to embed into the target web page.
Voilà. The viewer should just work once you’ve followed these steps. I hope this helps and that step 10 is fixed soon. Deep Zoom is a fantastic tool and being able to build your own and host it for free is a great thing.
UPDATE: this is now completely obsolete. The SeaDragon team now has a super-easy web-based tool. Just give it the URL of an image file on the web, and they will give you the code to embed the SeaDragon/DeepZoom view of it. http://www.seadragon.com.