Archives
-
Powershell output capturing and text wrapping: strange quirks... solved!
Summary
To capture (transcript) all output of a Powershell script, and control the way textwrapping is done, use the following approach from for exmaple a batch file or your Powershell code:
PowerShell -Command "`$host.UI.RawUI.BufferSize = new-object System.Management.Automation.Host.Size(512,50); `"c:\temp\testoutputandcapture.ps1`" -argument `"A value`"" >c:\temp\out.txt 2>&1
Note the '`' (backtick characters).
The problem: output capture and text wrap
Powershell is a great language, but I have been fighting and fighting with Powershell on two topics:
- to capture the output
- to get it output text in the max width that I want without unexpected wrapping
After reading the manuals you would think that the PowerShell transcripting possibilities are your stairways to heaven. You just start capturing output as follows:
- start-transcript "c:\temp\transcript.txt"
- do your thing
- stop-transcript
Try this with the following sample file c:\temp\testoutputandcapture.ps1:
Start-Transcript "c:\temp\transcript.txt"
function Output
{
    Write-Host "Write-Host"
    Write-Output "Write-Output"
    cmd.exe /c "echo Long long long long long long long long yes very long output from external command"
    PowerShell -Command "Write-Error 'error string'"
}
Output
Stop-Transcript
When you execute this script you get the following output:
PS C:\temp> C:\temp\testoutputandcapture.ps1
Transcript started, output file is c:\temp\transcript.txt
Write-Host
Write-Output
Long long long long long long long long yes very long output from external command
Write-Error 'error string' : error string
Transcript stopped, output file is C:\temp\transcript.txt
If we now look at the generated transcript file c:\temp\transcript.txt:
**********************
Windows PowerShell Transcript Start
Start time: 20081209001108
Username  : VS-D-SVDOMOSS-1\Administrator
Machine	  : VS-D-SVDOMOSS-1 (Microsoft Windows NT 5.2.3790 Service Pack 2)
**********************
Transcript started, output file is c:\temp\transcript.txt
Write-Host
Write-Output
**********************
Windows PowerShell Transcript End
End time: 20081209001108
**********************
The output from the external command (the texts Long long long long long long long long yes very long output from external command and Write-Error 'error string' : error string) is not captured!!!
Step one: piping output of external commands
This can be solved by appending | Write-Output to external commands:
Start-Transcript 'c:\temp\transcript.txt'
function Output
{
    Write-Host "Write-Host"
    Write-Output "Write-Output"
    cmd.exe /c "echo Long long long long long long long long yes very long output from external command" | Write-Output
    PowerShell -Command "Write-Error 'error string'" | Write-Output
}
Output
Stop-Transcript
This will result in the following output:
PS C:\temp> C:\temp\testoutputandcapture.ps1
Transcript started, output file is c:\temp\transcript.txt
Write-Host
Write-Output
Long long long long long long long long yes very long output from external command
Write-Error 'error string' : error string
Transcript stopped, output file is C:\temp\transcript.txt
Note that the error string Write-Error 'error string' : error string is not in red anymore.
The resulting transcript file c:\temp\transcript.txt now looks like:
**********************
Windows PowerShell Transcript Start
Start time: 20081209220137
Username  : VS-D-SVDOMOSS-1\Administrator
Machine	  : VS-D-SVDOMOSS-1 (Microsoft Windows NT 5.2.3790 Service Pack 2)
**********************
Transcript started, output file is c:\temp\transcript.txt
Write-Host
Write-Output
Long long long long long long long long yes very long output from external command
Write-Error 'error string' : error string
**********************
Windows PowerShell Transcript End
End time: 20081209220139
**********************
This is what we want in the transcript file, everything is captured, but we need to put | Write-Output after every external command. This is way to cumbersome if you have large scripts. For example in our situation there is a BuildAndPackageAll.ps1 script that includes a lot of files and cosists in totla of thousands of lines of Powershell code. There must be a better way...
Transcripting sucks, redirection?
Ok, so transcript just does not do the job of capturing all output. Lets look at another method: good old redirection.
We go back to our initial version of the script, and do c:\temp\testoutputandcapture.ps1 > c:\temp\out.txt. This results in a c:\temp\out.txt file with the following contents:
Transcript started, output file is c:\temp\transcript.txt
Write-Output
Long long long long long long long long yes very long output from external command
Write-Error 'error string' : error string
Transcript stopped, output file is C:\temp\transcript.txt
We are missing the Write-Host output! Actually, the Write-Host is the only line ending up in the transcript file;-)
This is not good enough, so another try, but now using the Powershell command-line host on the little modified script c:\temp\testoutputandcapture.ps1 that will showcase our next problem:
function Output
{
    Write-Host "Write-Host"
    Write-Output "Write-Output Long long long long long long long long yes very long output from Write-Output"
    cmd.exe /c "echo Long long long long long long long long yes very long output from external command"
    PowerShell -Command "Write-Error 'error string'"
}
Output
We now do: Powershell -Command "c:\temp\testoutputandcapture.ps1" > c:\temp\out.txt 2>&1 (2>&1 means: redirect stderr to stdout). We capture stderr as well, you never know where it is good for. This results in:
Write-Host
Write-Output Long long long long long long long l
ong yes very long output from Write-Output
Long long long long long long long long yes very long output from external command
Write-Error 'error string' : error string
I hate automatic text wrapping
As you may notice some strange things happen here:
- A long output line generated by PowerShell code is wrapped (at 50 characters in the above case)
- A long line generated by an external command, called from Powershell is not truncated
The reason the Powershell output is wrapped at 50 characters is because the dos box I started the command from is set to 50 characters wide. I did this on purpose to proof a case. Ok, so you can set your console window really wide, so no truncation is done? True. But you are not always in control of that. For example if you call your Powershell script from a batch file which is executed through Windows Explorer or through an external application like in my case CruiseControl.Net where I may provide an external command.
Powershell -PSConfigFile?... no way!
I hoped the solution would be in an extra parameter to the Powershell command-line host: -PSConfigFile. You can specify a Powershell console configuration XML file here that you can generate with the command Export-Console ConsoleConfiguration. This results in the ConsoleConfiguration.psc1 XML file:
<?xml version="1.0" encoding="utf-8"?>
<PSConsoleFile ConsoleSchemaVersion="1.0">
  <PSVersion>1.0</PSVersion>
  <PSSnapIns />
</PSConsoleFile>
I searched and searched for documentation on extra configuration like console width or something, but documentation on this is really sparse. So I fired up good old Reflector. After some drilling I ended up with the following code for the Export-Console command:
internal static void WriteToFile(MshConsoleInfo consoleInfo, string path)
{
    using (tracer.TraceMethod())
    {
        _mshsnapinTracer.WriteLine("Saving console info to file {0}.", new object[] { path });
         XmlWriterSettings settings = new XmlWriterSettings();
        settings.Indent = true;
        settings.Encoding = Encoding.UTF8;
        using (XmlWriter writer = XmlWriter.Create(path, settings))
        {
            writer.WriteStartDocument();
            writer.WriteStartElement("PSConsoleFile");
            writer.WriteAttributeString("ConsoleSchemaVersion", "1.0");
            writer.WriteStartElement("PSVersion");
            writer.WriteString(consoleInfo.PSVersion.ToString());
            writer.WriteEndElement();
            writer.WriteStartElement("PSSnapIns");
            foreach (PSSnapInInfo info in consoleInfo.ExternalPSSnapIns)
            {
                writer.WriteStartElement("PSSnapIn");
                writer.WriteAttributeString("Name", info.Name);
                writer.WriteEndElement();
            }
            writer.WriteEndElement();
            writer.WriteEndElement();
            writer.WriteEndDocument();
            writer.Close();
        }
        _mshsnapinTracer.WriteLine("Saving console info succeeded.", new object[0]);    }
}
So the XML that we already saw is all there is... a missed chance there.
A custom command-line PowerShell host?
I have written a few Powershell hosts already, for example one hosted into Visual Studio, and there I encountered the same wrapping issue which I solved by the following implementation of the PSHostRawUserInterface:
using System;
using System.Management.Automation.Host;

namespace Macaw.SolutionsFactory.DotNet3.IntegratedUI.Business.Components.Powershell
{
    /// <summary>
    /// Implementation of PSHostRawUserInterface.
    /// </summary>
    public class PowershellHostRawUI : PSHostRawUserInterface
    {
        :
        public override Size BufferSize
        {
            get
            {
                // The width is the width of the output, make it very wide!
                return new Size(512,1);
            }
            set
            {
                throw new Exception("BufferSize - set: The method or operation is not implemented.");
            }
        }
        :
    }
}
I solved transcripting in my own Powershell hosts by capturing all text output done by Powershell through custom implemented functions for the PSHostUserInterface you need to implement anyway, works like a breeze.
The solution, without custom host...
I was just getting started to solve the transcripting and wrapping issues by implementing again a Powershell host, but now a command-line Powershell host when I did one last digging step. What is you can set the BufferSize at runtime in your Powershell code. And the answer is.... yes you can! Through the $host Powershell variable: $host.UI.RawUI.BufferSize = new-object System.Management.Automation.Host.Size(512,50). This says that the output may be max 512 chars wide, the height may not be 1 (as in my code), bu this height value is not important in this case. It is used for paging in a interactive shell.
And this last statement gives us full control and solves all our transcripting and wrapping issues:
PowerShell -Command "`$host.UI.RawUI.BufferSize = new-object System.Management.Automation.Host.Size(512,50); `"c:\temp\testoutputandcapture.ps1`" -argument `"A value`"" >c:\temp\out.txt 2>&1
And this concludes a long journey into the transcripting and wrapping caves of Powershell. I hope this will save you the days of searching we had to put into it to tame the great but naughty Powershell beast.
-
Powershell: Generate simple XML from text, useful for CruiseControl.Net merge files
I had the problem that I need to include ordinary text files into the CruiseControl.Net build output log file. This log file is a merge of multiple files in xml format. So I needed to get some text files into a simple xml format. I ended up with the following Powershell code to convert an input text file to a simple output xml file
Powershell code:
function Convert-XmlString
{
param
(
[string]$text
)
# Escape Xml markup characters (http://www.w3.org/TR/2006/REC-xml-20060816/#syntax)
$text.replace('&', '&').replace("'", ''').replace('"', '"').replace('<', '<').replace('>', '>')
}function Convert-TextToXml
{
param
(
$rootNode = 'root',
$node = 'node',
$path = $(Throw 'Missing argument: path'),
$destination = $(Throw 'Missing argument: destination')
)
Get-Content -Path $path | ForEach-Object `
-Begin {
Write-Output "<$rootNode>"
} `
-Process {
Write-Output " <$node>$(Convert-XmlString -text $_)</$node>"
} `
-End {
Write-Output "</$rootNode>"
} | Set-Content -Path $destination -Force
}You can call this code as follows:
Convert-TextToXml -rootNode 'BuildAndPackageAll' -node 'message' -path 'c:\temp\in.txt' -destination 'c:\temp\out.xml'
where the file c:\temp\in.txt:
This is line 1
This is a line with the characters <, >, &, ' and "
This is line 3Will be converted the the file c:\temp\out.xml:
<BuildAndPackageAll>
<message>This is line 1</message>
<message>This is a line with the characters <, >, &, ' and "</message>
<message>This is line 3</message>
</BuildAndPackageAll> -
Moss 2007 StsAdm Reference Poster by Microsoft
All SharePoint developers and administrators will be familiar with the Stsadm.exe command line tool in the bin folder of the "12 hive", normally located at: C:\Program Files\Common Files\Microsoft Shared\web server extensions\12\BIN\STSADM.EXE. This tool has many available operations and an extensibility model. For a nice poster on all available operations (Moss2007 SP1) and available properties, see http://go.microsoft.com/fwlink/?LinkId=120150.
- See Index for Stsadm operations and properties (Office SharePoint Server) for MSDN documentation on Stsadm operations and properties.
- See Extending Stsadm.exe with Custom Commands for MSDN documentation on extending Stsadm.
- See the STSADM Custom Extension blog (http://stsadm.blogspot.com/) for a extensive set of extensions by Gary Lapointe.
Although Stsadm is a nice mechanism for managing SharePoint, we really need a PowerShell interface to do all these same operations. There are already some first small PowerShell libraries available, and also Gary Lapointe is starting a PowerShell library. See this blog post for his first steps in this direction.
-
Notes from PDC Session: Extending SharePoint Online
******* REMOVED SOME HARSH WORDS ON THE SESSION *******
I took some notes, and augmented it with some of my own thoughts and information.
-------
SharePoint Online provides:
Managed Services on the net
- No server deployment needed, just a few clicks to bring your instance up and running
- Unified admin center for online services
- Single sign on system, no federated active directory yet
Enterprise class Reliability
- Good uptime
- Anti virus
-...
SharePoint online is available in two tastes: standard (hosted in the cloud) and dedicated (on premises)
Standard is most interesting I think: minimum of 5 seats, max 1TB storage.
On standard we have no custom code deployment, so we need to be inventive!
SharePoint Online is a subset of the standard SharePoint product (extensive slide on this in the slide deck, no access to that yet)
SharePoint online is for intranet, not for anonymous internet publishing.
$15 for the complete suite: Exchange, SharePoint, SharePoint, Office Live Meeting. Separate parts are a few dollars a piece.
Base os SharePoint Online is MOSS, but just a subset of functionality is available. Also just the usual suspect set of site templates is available: blank, team, wiki, blog, meeting.
SharePoint Online can be accessed through the Office apps, SharePoint designer and throuth the web services.
SharePoint Designer:
- No code WF
- Customize content types
- Design custom look and feel
Silverlight:
- talk to the web services of SharePoint online.
- Uses authentication of current user accessing the page hosting the Silverlight control
- See http://silverlight.net/forums/p/26453/92363.aspx for some discussion on getting a SharePoint web service call working
Data View Web Part:
- Consume data from a data source
- Consume RSS feeds through http GET
- Consume http data through HTTP GET/POST
- Consume web services
- ...
- Configure filter, order, paging etc.
- Select columns, rename columns, ...
- Result is an XSLT file
This XSLT code can be modified at will. There are infinite formatting capabilities with XSLT. Also a set of powerful XSLT extension functions is available in the ddwrt namespace (See http://msdn.microsoft.com/en-us/library/aa505323.aspx for a SharePoint 2003 article on this function set, see reflector for additional functions in the 2007 version;-)). See http://www.tonstegeman.com/Blog/Lists/Posts/Post.aspx?ID=85 for writing XSLT extension functions when you are able to deploy code, so not for the online scenario; this was not possible on SharePoint 2003).
Note that the Data View Web Part can only be constructed with SharePoint designer.
InfoPath client: custom forms for workflows
Web services: Can be used from custom apps (command line, win forms, ...), but also from Silverlight to have functionality that is hosted in your SharePoint Online site itself.
You can also host custom web pages on your own server or in the cloud on Windows Azure (the new Microsoft cloud platform), and call SharePoint Online web services in the code behind of these pages.
What can't be done:
- No Farm wide configurations
- No Server side code
- No custom web parts
- No site definitions
- No coded workflows
- No features
- No ...
There is still a lot that can be done, but that will be an adventure to find out exactly....
-
From the PDC: Windows Azure - the Windows cloud server - is here!
New times have arived! Exactly what we hoped for, developing for the cloud using Microsoft technology. Of course, EC2 and Google App Engine did beat Microsoft in timing, but bringing up Linux instances, and learning python happened to be a big hurdle for a guy who has been using Microsoft technology for too long. I did some testing with both platforms and was impressed by their concepts. But the Azure cloud platform that Microsoft announced today is more "my kind of candy".
In the PDC keynote I wrote down some twitter messages on my iPhone (I love Twitterific!), you can read them at: http://twitter.com/svdoever
Also have a look at the great posts by http://weblogs.asp.net/pgielens on Azure. I will blog some more thougths on the new platform in the next days, but now the session on Extending SharePoint Online is starting!
-
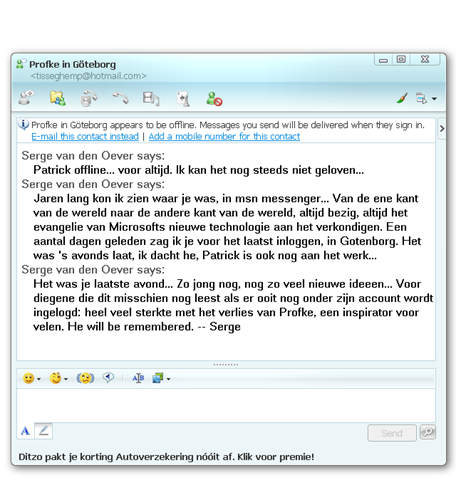
SharePoint Wizard and MVP Patrick "Profke" Tisseghem is offline, till the end of time...
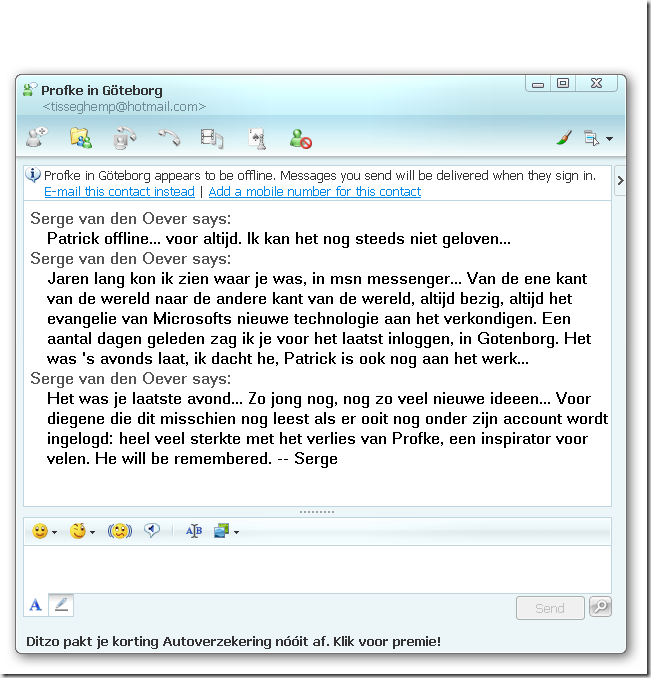
For years and years I have followed the travels of Patrick "Profke" Tisseghem from one end of the world to the other end of the world on my screen in Windows Live Messenger. Patrick was a busy guy, evangelizing, educating, inspiring the world. It was always good to see when he was back @home either in Belgium or Cyprus for some well deserved time with his family. A few days ago I saw his new, and what later appeared to be his last, destination: Goteborg in Sweden. For the last days his status remained offline, nothing for him... Today I understood why....
Patrick and his colleagues did visit Macaw, the company I work for, many times with their great and inspiring courses. Patrick is highly respected, and awell known face within our company.
The last time I spoke to Patrick in person was at Devdays in Amsterdam in May. We had a beer in the sun at "Strand Zuid" and talked about our family and kids, his house on Cyprus, and some new ideas he had on how to have SharePoint feature updates without getting into trouble. We were with a large group of Macaw colleagues, and he bought us all a round of drinks we drank on his luck. It is terrible to see that his luck ran out so quick.
The last chat on Messenger was at the end of July, he was @home in Cyprus. I told him about the birth of my third child. Life comes, life goes... it is a cruel world.
Profke, happy travels in what lies ahead... I wonder if they are using SharePoint on the other side. We will have a beer when I arrive...
My thoughts go out to his wife Linda and his two daughters, let the light be with you all to guide you through this difficult time.
namasté
---------------------------------------------------------------------------------
See Patrick's blog for a last message from his wife Linda
See Jan Thielens' blog for a spontaneous condolence register
See Karine Bosch' blog for a beautiful farewell message from a good colleague and friend
-
Post to self: getting the directory where the CLR is installed in PowerShell
[System.Runtime.InteropServices.RuntimeEnvironment]::GetRuntimeDirectory()
will return a path like: c:\WINDOWS\Microsoft.NET\Framework\v2.0.50727\
-
C:\Program Files\Reference Assemblies for assemblies to reference in your code
I just stumbles across a "new" concept of Microsoft. In the C:\Program Files\Reference Assemblies folder Microsoft installs assemblies for products that can be referenced from your code. Instead of referencing assemblies directly from the GAC or copying an assembly from an installation folder or the GAC to your project for reference, you can now reference the assemblies in this folder.
We have a similar approach in our Macaw Solutions Factory where we have a _SharedAssemblies folder to keep track of all external assemblies to reference. We prefer to keep the assemblies with the source that is checked into source control, because otherwise it is possible that a build server does not contain the expected assemblies when compiling a checked-out solution and can't successfully compile the solution.
On the MsBuild team blog you can read more about this feature that happened to be with us since the .Net 3.0 framework:
http://blogs.msdn.com/msbuild/archive/2007/04/12/new-reference-assemblies-location.aspx
Also other applications like PowerShell keep their assemblies to reference in this location.
-
Use VS2008 to create a VSPackage that runs in VS2008 and VS2005
We all want to use the new features in Visual Studio 2008 during development. When using VS2008 for VsPackage development we need to install the Visual Studio 2008 SDK. The approach taken for building VsPackages in VS2008 is incompatible with the approach taken in VS2005. In this article I explain an approach to use VS2008 to build a compatible VsPackage that can be tested in the experimental hives of both versions of Visual Studio.
About VsPackage
- A VsPackage is a very powerful Visual Studio extensibility mechanism
- Visual studio knows about a VsPackage and its functionality through registry registrations
- To test a VsPackage without messing up your Visual Studio, the Visual Studio SDK created a special experimental “registry hive” containing all required Visual Studio registrations. Visual studio can be started with the name of this hive to test your VsPackage in a “sandbox” environment
- This hive can be reset to its initial state in case of problems or to do a clean test
- In Visual studio 2005 the hive is created under HKEY_LOCAL_MACHINE, this gives issues under Vista where a normal user may not write to this part of the registry
- In Visual studio a “per user” experimental hive is supported, so you can do Run As a Normal User development
In the Visual Studio 2005 SDK the experimental hive was created on installation because the same experimental hive was used for all users. In the Visual studio 2008 SDK the experimental hive is per used, so each user needs to recreate it’s own expirimental hive. You can do this by executing the following command from the Start Menu: Microsoft Visual Studio 2008 SDK -> Tools -> Reset the Microsoft Visual Studio 2008 Experimental hive.
What this command does is executing the following command: VSRegEx.exe GetOrig 9.0 Exp RANU. The RANU argument means: Run As a Normal User.
Referenced assemblies
A VS2008 VsPackage project will normally reference the following assemblies:
<Reference Include="Microsoft.VisualStudio.OLE.Interop" />
<Reference Include="Microsoft.VisualStudio.Shell.Interop" />
<Reference Include="Microsoft.VisualStudio.Shell.Interop.8.0" />
<Reference Include="Microsoft.VisualStudio.Shell.Interop.9.0" />
<Reference Include="Microsoft.VisualStudio.TextManager.Interop" />
<Reference Include="Microsoft.VisualStudio.Shell.9.0" />
If we want to run the VsPackage on VS2005 as well, we may not reference assemblies from VS2008 (the assemblies ending with 9.0). The set of assemblies we should reference are:
<Reference Include="Microsoft.VisualStudio.OLE.Interop" />
<Reference Include="Microsoft.VisualStudio.Shell.Interop" />
<Reference Include="Microsoft.VisualStudio.Shell.Interop.8.0" />
<Reference Include="Microsoft.VisualStudio.TextManager.Interop" />
<Reference Include="Microsoft.VisualStudio.Shell" />
VsPackage registration
But because Visual Studio uses a tool called RegPkg.exe to generate the required registry entries to make the VsPackage known to Visual Studio, and that the RegPkg.exe application for VS2008 uses the Microsoft.VisualStudio.Shell.9.0 assembly and the RegPkg.exe application for VS2005 uses the the Microsoft.VisualStudio.Shell assembly, we have a problem.
But Microsoft was so kind to provide a howto on migrating VsPackage projects to VS2008. See http://msdn.microsoft.com/en-us/library/cc512930.aspx for more information. If you have followed the steps to migrate an existing VS2005 project to VS2008, there is an interesting section on what to do if you want to use the Microsoft.VisualStudio.Shell assembly instead of the Microsoft.VisualStudio.Shell.9.0 assembly, and in that way stay compatible with VS2005.
The steps are as follows:
A VsPackage project has a project file that is actually an MsBuild file. To open this file in Visual studio do the following:
- Right click on the VsPackage project
- Select Unload Project (save changes if requested)
- See the project named changed from FooBar to FooBar (unavailable)
- Right click again and select Edit FooBar.csproj
- Add the following lines to the last PropertyGroup:
<!-- Make sure we are 2005 compatible, and don't rely on RegPkg.exe
of VS2008 which uses Microsoft.VisualStudio.Shell.9.0 -->
<UseVS2005MPF>true</UseVS2005MPF>
<!-- Don't try to run as a normal user (RANA),
create experimental hive in HKEY_LOCAL_MACHINE -->
<RegisterWithRanu>false</RegisterWithRanu> - Save project file
- Right click on the project and select Reload Project
After these changes the RegPkg.exe for VS2005 is used to generate the registry settings. But this tool can only generate registry settings for a hive in HKEY_LOCAL_MACHINE, and not for a hive in HKEY_CURRENT_USER. This means that development must be done as an administrator.
If we now build the application we get the following error: “Failed to retrieve paths under VSTemplate for the specified registry hive.”, we must register a new registry hive for VS2008 in HKEY_LOCAL_MACHINE with the following command: VSRegEx.exe GetOrig 9.0 Exp.
For more information on the RegPkg.exe utility, see the excellent blog post at http://www.architekturaforum.hu/blogs/divedeeper/archive/2008/01/22/LearnVSXNowPart8.aspx. Don’t forget to read the rest of that blog post series.
Last step to do is changing the way VS2008 is launched when debugging the VsPackage with F5. Right-click the VsPackage project and select properties. Now remove RANU from the command line arguments box:
![clip_image002[5]](https://aspblogs.blob.core.windows.net/media/soever/WindowsLiveWriter/UseVS2008tocreateaVSPackagethatrunsinVS2_1471A/clip_image002%255B5%255D_thumb.jpg)
Because we want to target both VS2005 and VS2008 with the VsPackage, we should also test the package on VS2005. So assuming that VS2005 is installed on the development machine as well, create an experimental hive for VS2005 using the command: VSRegEx.exe GetOrig 8.0 Exp. We don’t need to install this experimental hive if we installed the Visual Studio SDK for VS2005 as well.
To register the VsPackage for VS2005 as well and start VS2005 under the experimental hive, you can add a small batch script to your solution. Add a file TestInVS2005.bat in the root of the solution folder as a solution item. The TestInVS2005.bat file should have the following content:
"%VSSDK90Install%VisualStudioIntegration\Tools\Bin\VS2005\regpkg.exe" /root:Software\Microsoft\VisualStudio\8.0Exp /codebase %~dp0FooBar\bin\Debug\FooBar.dll
"%VS80COMNTOOLS%..\IDE\devenv.exe" /rootSuffix exp
Pause
We can now right-click on the TestInVs2005.bat file, select Open With… and browse to the TestInVs2005.bat file itself to open the file with. It then starts the batch script.
-
Edit file in Wss3 web application with SharePoint Designer blows up your web site
I wanted to create a simple html file in the root of my Wss3 web application, so I created an empty file test.htm. I double clicked te file and because I have SharePoint Designer installed, it is the default editor for .htm files. I put some test into the .htm file along the lines of "Hello world!", and boom: my Wss3 web application is dead. I get the following error:
Server Error in '/' Application.
Parser Error
Description: An error occurred during the parsing of a resource required to service this request. Please review the following specific parse error details and modify your source file appropriately.
Parser Error Message: Data at the root level is invalid. Line 1, position 1.
Source Error:Line 1: <browsers> Line 2: <browser id="Safari2" parentID="Safari1Plus"> Line 3: <controlAdapters>
Source File: /App_Browsers/compat.browser Line: 1
Version Information: Microsoft .NET Framework Version:2.0.50727.832; ASP.NET Version:2.0.50727.832After some searching I found what happened:
When you open a file with SharePoint Designer, it creates all kind of FrontPage Server Extension functionality in your web application. One thing it does it that it creates a _vti_cnf folder in every folder you have in your web application. If you remove all these folders you fix your problem.
I don't know of a handy DOS command to delete all these folders recursively, but with some PowerShell I solved the problem.
Open a PowerShell prompt, set the current directory to the folder hosting your web application and execute the following command to see the "damage":
PS C:\Inetpub\wwwroot\wss\VirtualDirectories\wss3dev> get-childitem -path . -name _vti_cnf -recurse
_vti_cnf<br />App_Browsers\_vti_cnf <br />App_GlobalResources\_vti_cnf <br />aspnet_client\system_web\2_0_50727\CrystalReportWebFormViewer3\CSs\_vti_cnf <br />aspnet_client\system_web\2_0_50727\CrystalReportWebFormViewer3\html\_vti_cnf <br />aspnet_client\system_web\2_0_50727\CrystalReportWebFormViewer3\Images\ToolBar\_vti_cnf <br />aspnet_client\system_web\2_0_50727\CrystalReportWebFormViewer3\Images\Tree\_vti_cnf <br />aspnet_client\system_web\2_0_50727\CrystalReportWebFormViewer3\JS\_vti_cnf <br />wpresources\_vti_cnf <br />_app_bin\_vti_cnf</font></p>Now execute the following PowerShell command to kill all these folders and become a happy camper again:
PS C:\Inetpub\wwwroot\wss\VirtualDirectories\wss3dev> get-childitem -path . -name _vti_cnf -recurse | % { remove-item -Path $_ -recurse }
-
Reduce the size of a virtual hard disk before delivery for reuse
When delivering a virtual hard disk to your team to build their virtual machines on I perform the following steps to minimize the size of the virtual hard disk. It is assumed that Virtual Server 2005 R2 SP1 is installed.
- Make sure you merged the Undo disks, and that differencing disks are merged with their parent disks
- Disable undo disks
- Start the virtual machine to compact
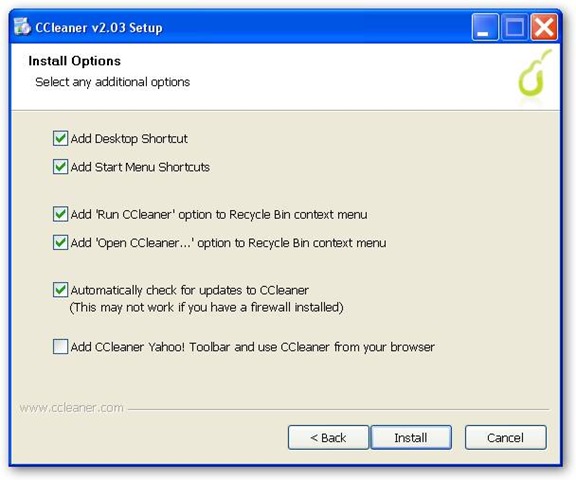
- In the virtual machine download CCleaner on http://www.ccleaner.com . This is a great tool to clean your disk from history files, cache files etc. I run this almost daily on my virtual machines and my host system. Thanks Danny for introducing me to this great tool.
Quote from their website:
CCleaner is a freeware system optimization and privacy tool. It removes unused files from your system - allowing Windows to run faster and freeing up valuable hard disk space. It also cleans traces of your online activities such as your Internet history. But the best part is that it's fast (normally taking less than a second to run) and contains NO Spyware or Adware! :)
During installation beware of the option to install the Yahoo toolbar, you often overlook this co-packaging options from Microsoft, Google and Yahoo: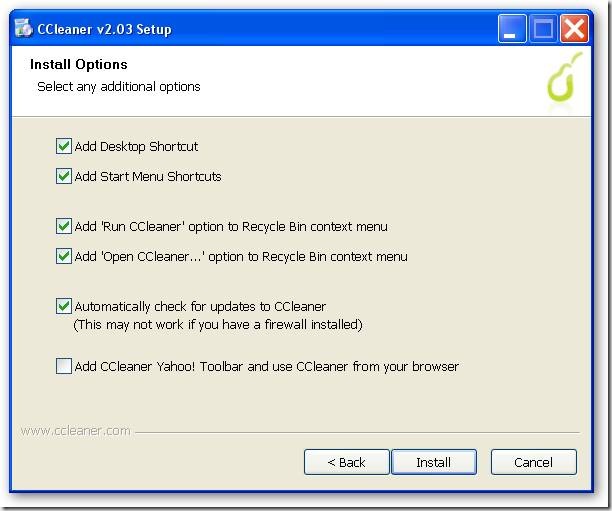
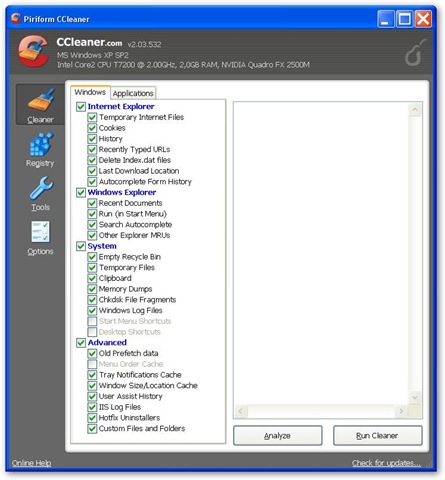
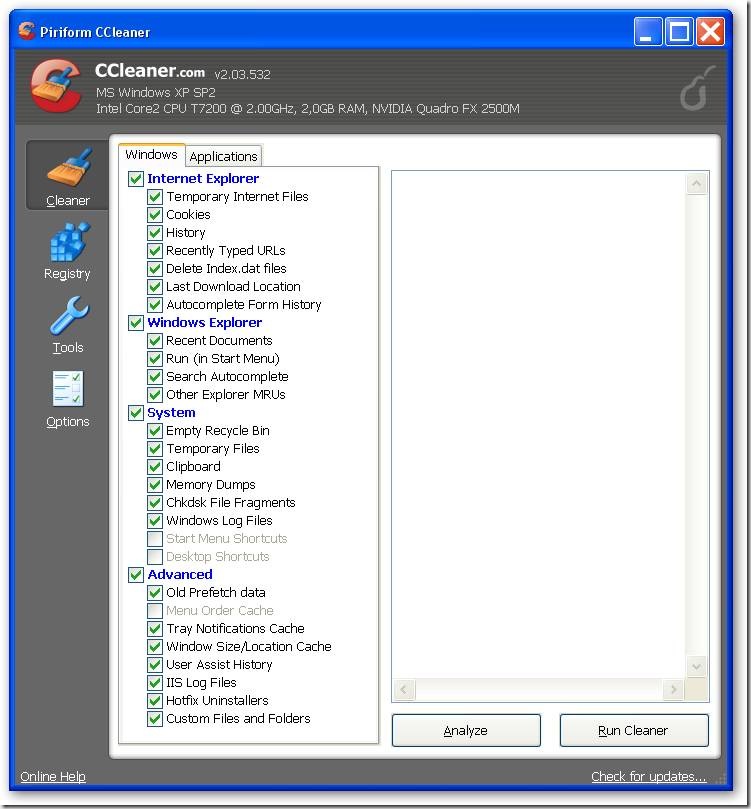
- In the virtual machine run CCleaner with the options you prefer, my options are:
- Shut down the virtual machine
- Mount the virtual hard disk to compact using vhdmount (part of Virtual Server 2005 R2 SP1):
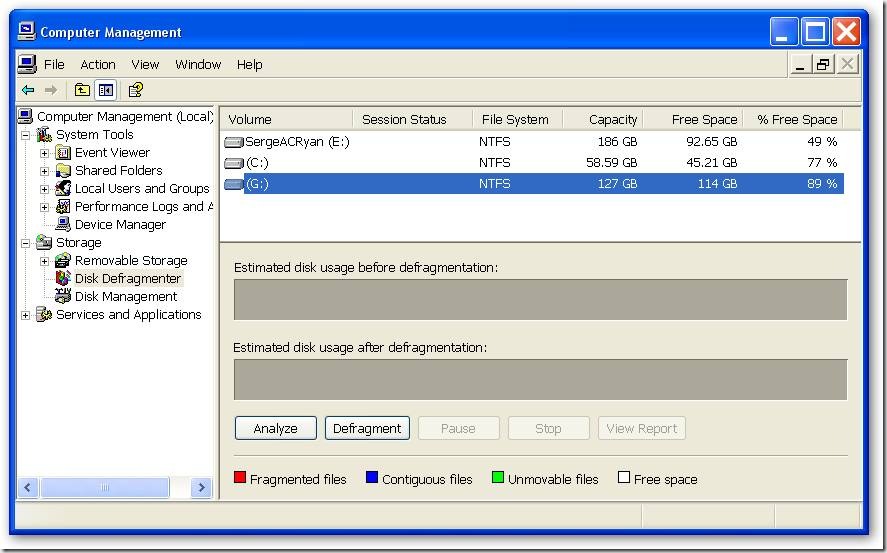
"C:\Program Files\Microsoft Virtual Server\Vhdmount\vhdmount" /p “drive:\folder\YourVirtualHarddiskToCompress.vhd” - Go to Start > My Computer; Right-click and select Manage. Now defragment the disk mounted in step 6
- "C:\Program Files\Microsoft Virtual Server\Vhdmount\vhdmount" /u /c “drive:\folder\YourVirtualHarddiskToCompress.vhd”
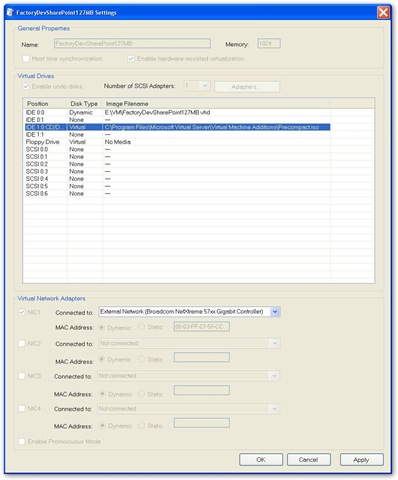
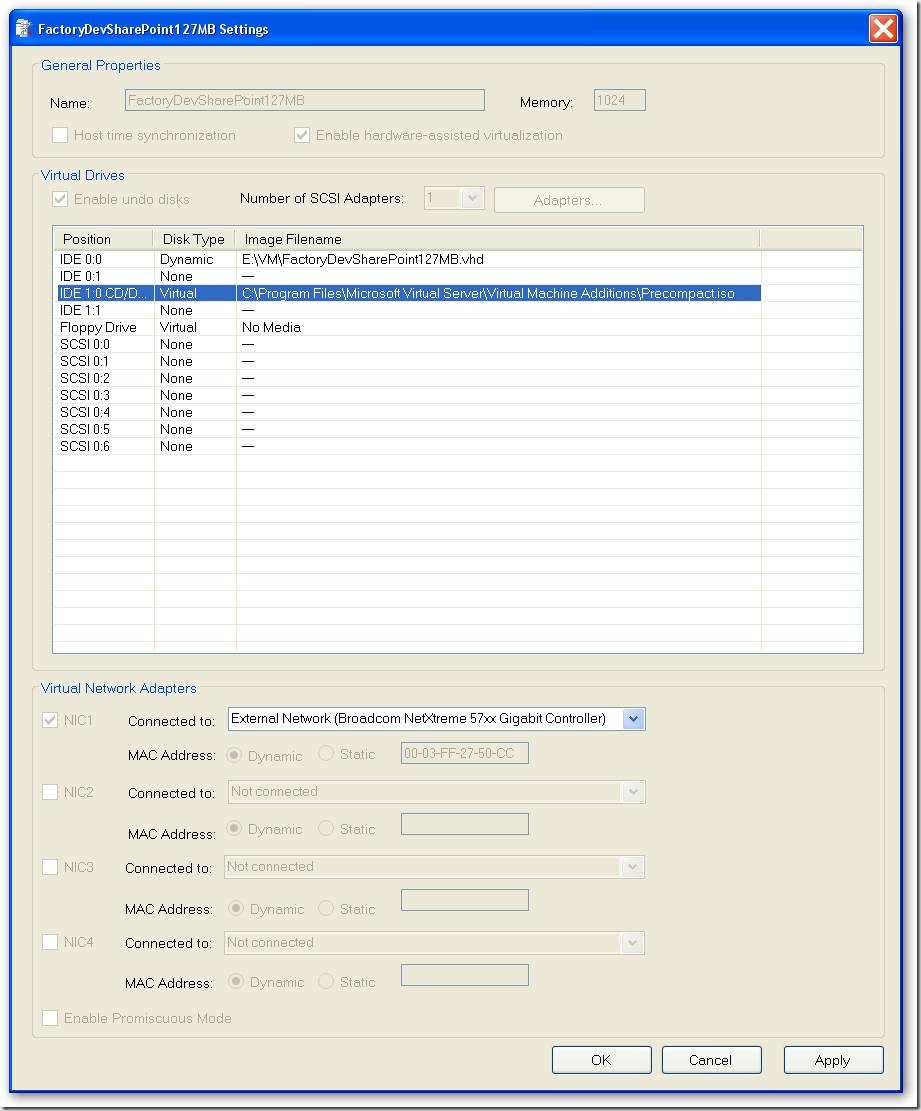
- Now start your virtual machine, and mount the ISO image C:\Program Files\Microsoft Virtual Server\Virtual Machine Additions\Precompact.iso. I personally use VMRCPlus to mount the ISO, right-click on CD-Drive and select Attach Media Image file… as shown in the screenshot below
- When you navigate to the drive where the ISO image is mounted, the precompaction starts. The precompaction writes zero’s in all unused space in the disk, so the disk can be compacted in the next steps.
- Shut down the virtual machine
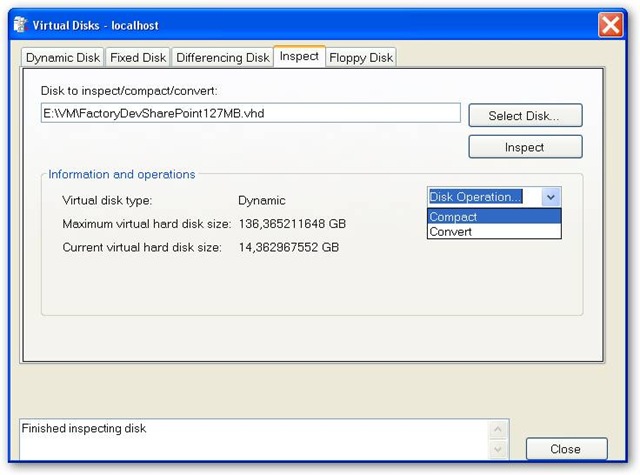
- Now start compaction of the virtual disk. This can be done in VirtualPC 2007, in the administrative web Virtual Server 2005, or in VMRCPlus, which I use here. Navigate to Tools > Virtual Disks > Inspect Virtual Hard disk, select your vhd to compact and select disk operation Compact
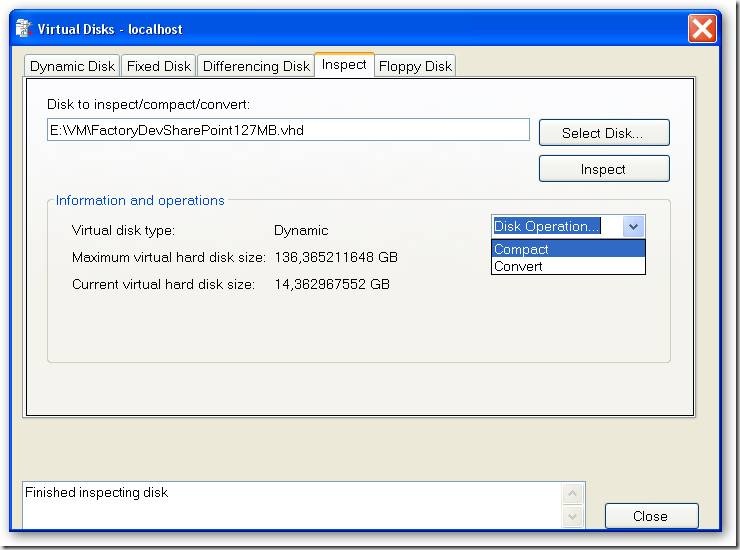
- Done! Make your virtual hard disk read only, and start creating differencing disks based on your new base disk.
-
VirtualPC/Virtual Server machine at higher resolution than 1600x1200!
I have always been so annoyed by the fact that on my laptop with 1920x1200 resolution I could only get a connection to my virtual machines at a resolution of 1600x1200, the max resolution by the emulates S3 graphics board, resulting in two 160 pixesl wide black bars on the left and right sides. But on Vista I did get a connection on higher resolutions, after some searching I found that the old Remote Desktop Connection software of XP (SP2) was the problem. Upgrade it to version 6 and you worries are over. See: http://support.microsoft.com/kb/925876/en-us. Happy virtual development!
-
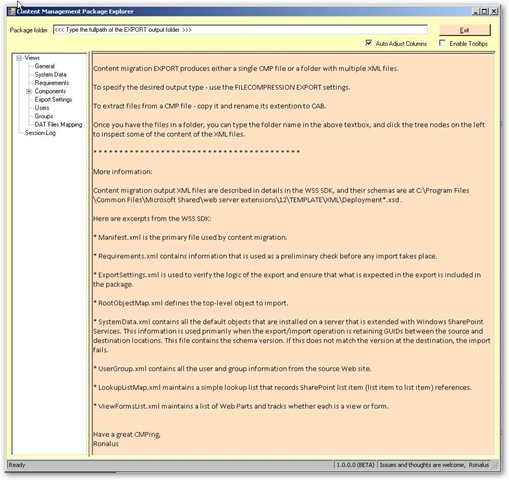
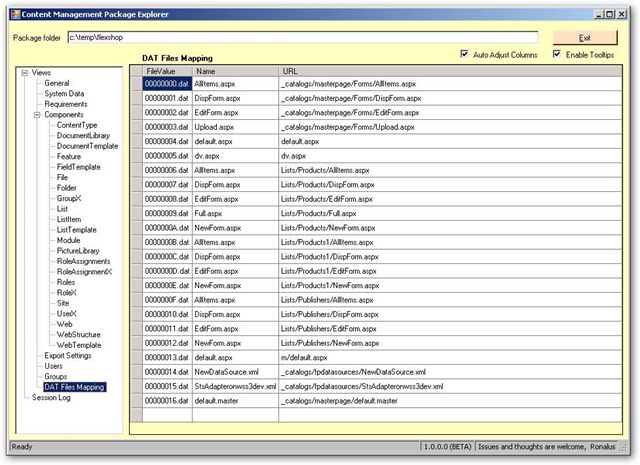
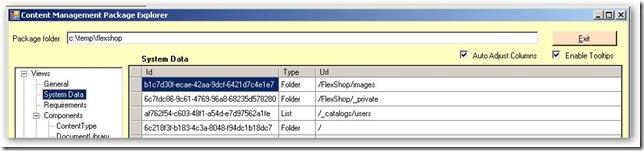
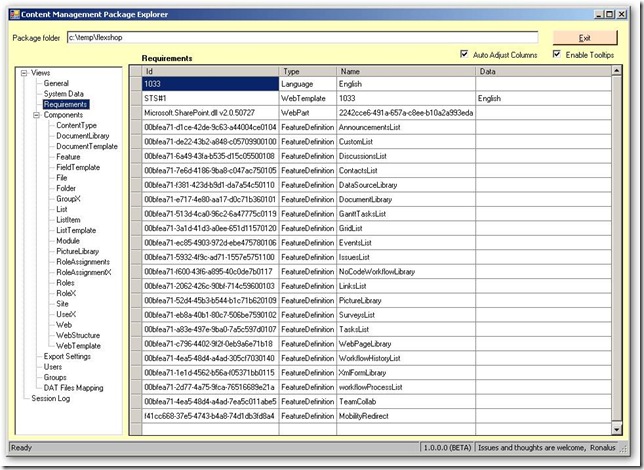
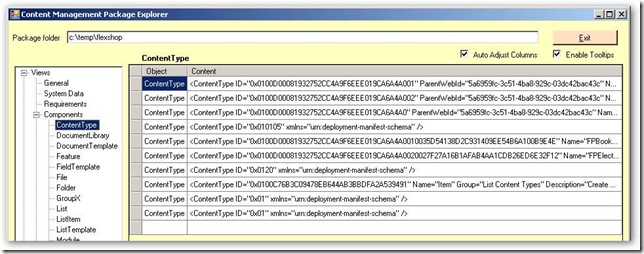
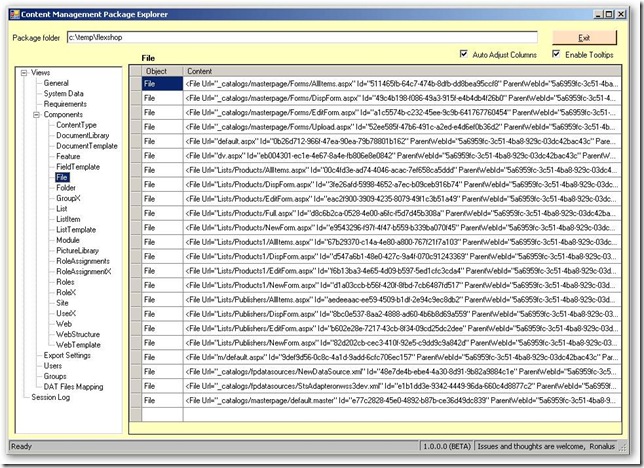
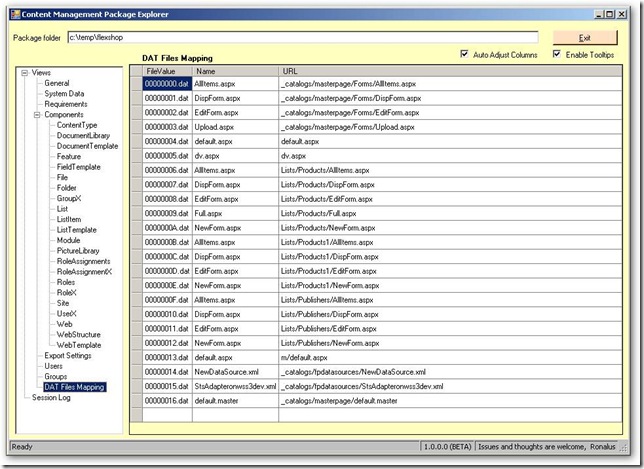
SharePoint Content Management Package (CMP) explorer
Ronalus has created a great small utility to explore the contents of SharePoint Content Management Pages called Content Migration Package Explorer.
This tool can be used to investigate the data exported by the SharePoint Content Migration API. You can create an export either with stsadm.exe, or with custom code.
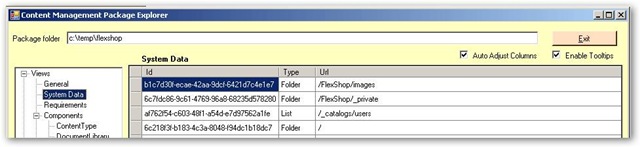
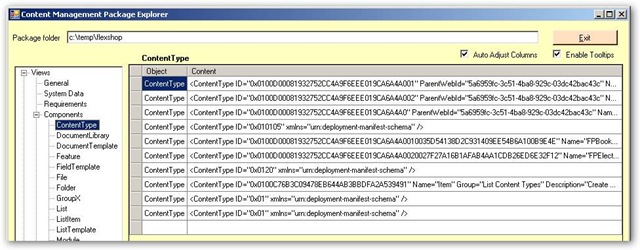
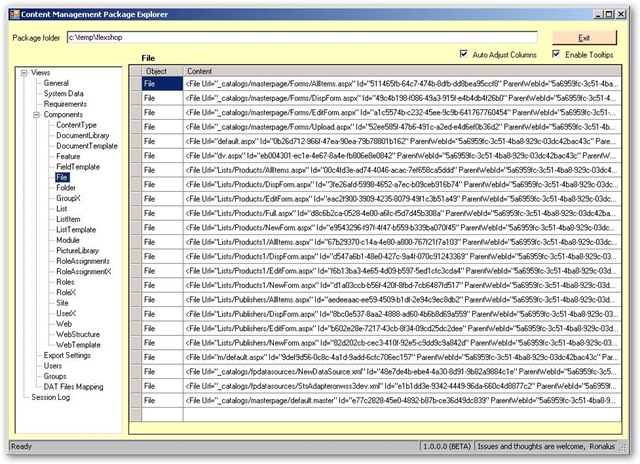
As example for this weblog I exported a simple site containing some test data using the following command:
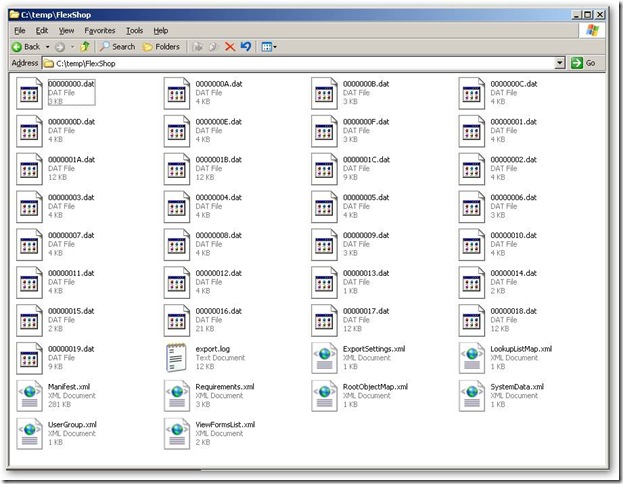
Stsadm.exe –o export –url http://wss3dev/FlexShop -filename c:\temp\FlexShop -nofilecompression
We now have a folder containing the output files, a set XML files and other files:
If we fire up the Content Migration Package Explorer we get the following startup screen:
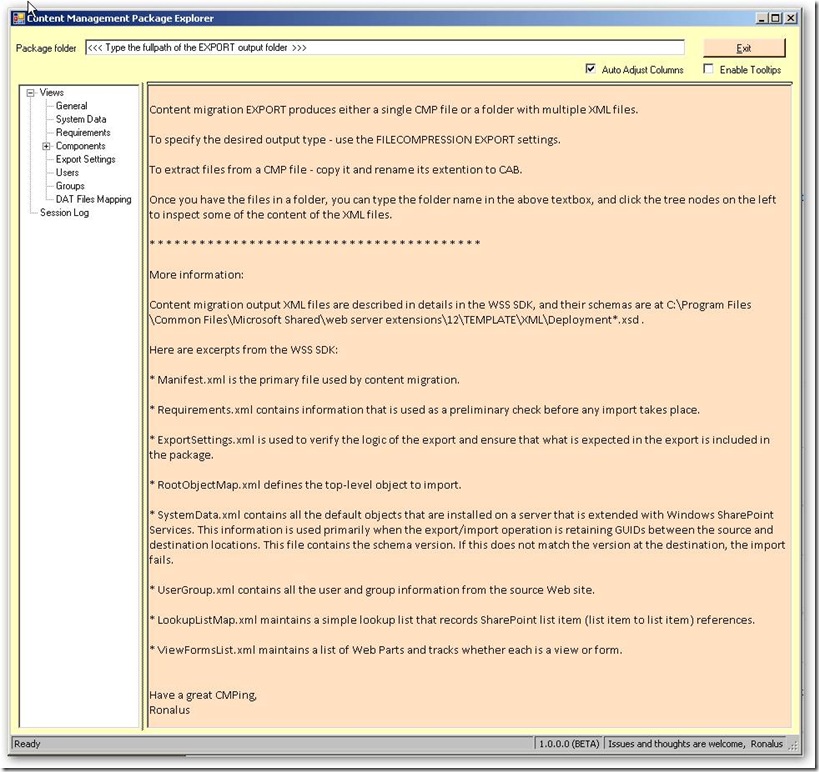
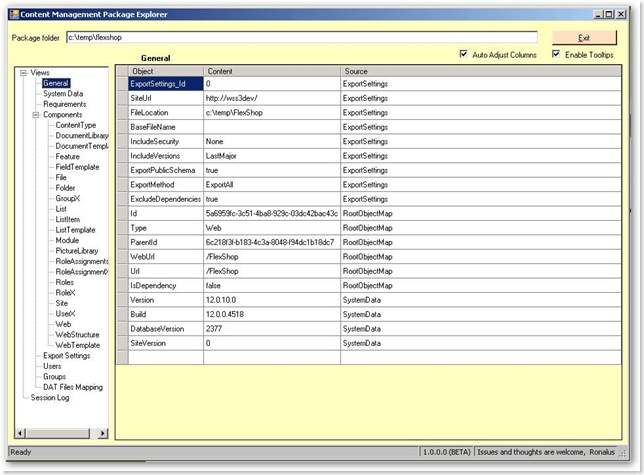
You can now enter the export folder and browse through the exported information using a simple to use explorer, see below for some screenshots:
-
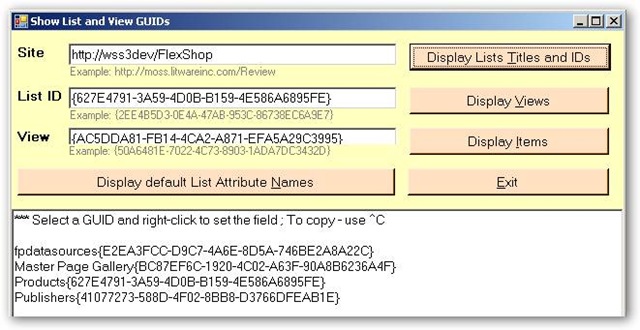
SharePoint development: handy little utility to get GUID’s and Attribute names
I just stumbled accross a handy little utility that is really handy during SharePoint development: Show List and ViewGUIDs.
Type a Site URL, and select “Display Lists Titles and Ids”. From the list of lists you can select a list GUID, and with right-click copy it to the List ID input field.
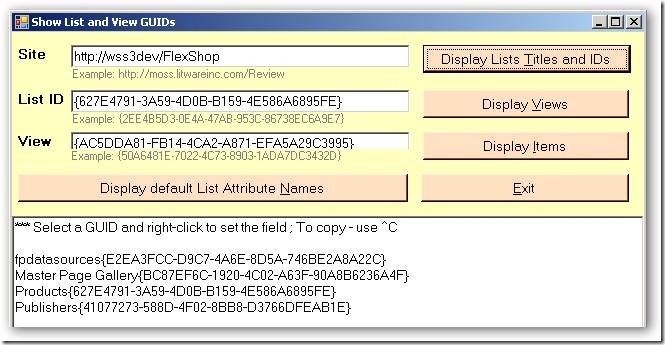
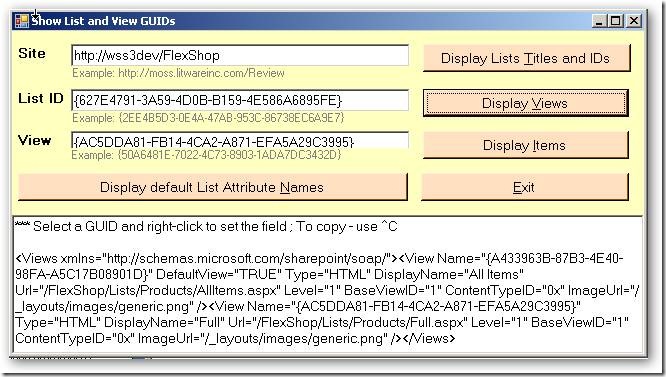
After clicking “Display Views” you see the available list views. Again you can select a view guid, and with right-click copy it to the View input field.
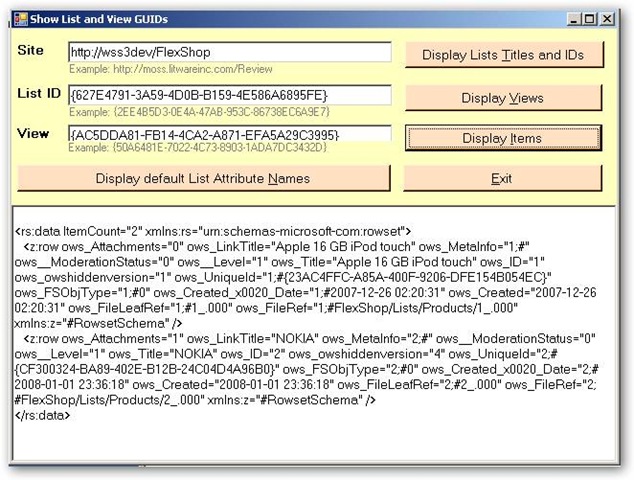
Select “Display Items” to display the list items in the view.

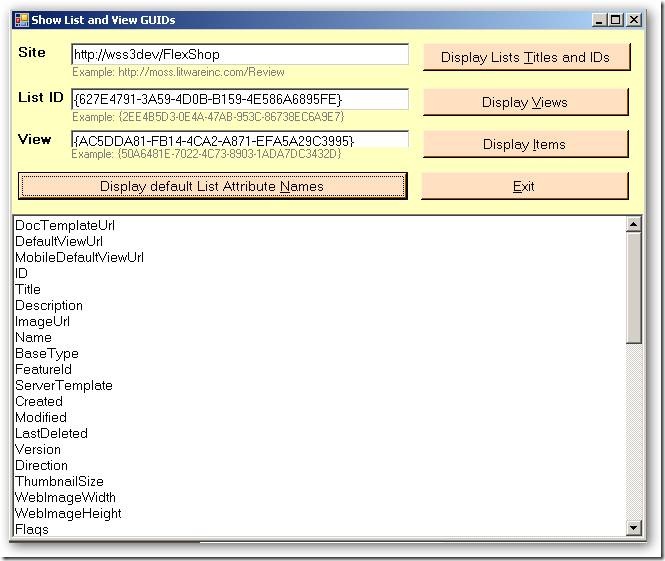
With a click on “Display default List Attribute Names” de internal names of the fields in the list are displayed.
Very useful if you don't have tools like SharePoint Explorer or SharePoint Inspector installed, or if you find those tools too large/slow/complex to get some GUIDs and name information fast.
![clip_image002[5]](https://aspblogs.blob.core.windows.net/media/soever/WindowsLiveWriter/UseVS2008tocreateaVSPackagethatrunsinVS2_1471A/clip_image002%255B5%255D.jpg)