Contents tagged with Cool Tools
-
Unicorns, Triple Rainbows, Package Management and Lasers

Since the dawn of time, developers have been adding references to projects.
Even longer, they’ve been doing it through a cumbersome and tedious manual process.
You know the routine. C’mon. Play along with me:
- Launch web browser
- Search for the website for the library you want to add
- Hunt down the latest version of said library
- Download to your local drive
- Extract files to some forgotten location
- Copy files to your solution directory
- Add references to your project(s)
- Lather, Rinse, Repeat
It’s ugly. And it’s something every developer does almost every day (at the very least, once at the beginning of a project).
Brothers and sisters, I say stop the insanity! Lay down those manual processes for shiny happy new and improved ones. Embrace the future now. Embrace NuPack!

A Brief History of Time
The lather, rinse, repeat scenario has been one dogging developers forever. A couple of years ago there were discussions about .NET package management in various corners around the universe. I remember event talking about it in a fishbowl session during ALT.NET Calgary and there was a lot of interest back then, but no solution. In the .NET universe there’s plenty of code out there and some of it is even good (not mine). To paraphrase Sebastien Lambla:
Finding great .NET code is easy. Using it and managing all the dependencies that can exist between packages is not.
What’s a developer supposed to do trying to get the right version without going through the geek junk punch each and every time? The Ruby world has had RubyGems, a standard for publishing and managing third party libraries, since 2003. Package management is no stranger to the Linux world. It was one of the key things that made me switch to Debian a few years back with it’s Advanced Package Tool (Apt) system of delivering applications and keeping them up to date.
There have been so many kicks at the can with this problem and .NET with some being very successful and others being just vaporware. I won’t get into details on each of them but feel free to check out OpenWrap, Hornget, and NPackage to get started on alternatives.
The Nu Kid on the Block
A few months ago I personally stumbled over Rob Reynolds post about Nu. It was cool. Within hours of downloading and installing it I was creating gems and writing blog posts and telling the world how great Nu was and how I wanted to make love to it. I became deeply entrenched with Nu simply because it worked and solved a problem. It was easy, low friction (get over the Ruby install .NET developers, we’re better than that!) and other people seemed to like it. Since then we got a new wiki going, new releases were coming out, improvements were being made, and I was a little gem producing machine. Life was good.
Around that time I was also approached by Microsoft about a double-secret-probation project that they were looking for feedback on. Together with Rob Reynolds, Dru Sellers, and Eric Hexter we spent the next few weeks collaborating together with Microsoft directly on NuPack.

NuPack
NuPack is an open source, integrated package management tool for adding libraries and tools to your .NET projects. It is available as a command line tool, integrated console window inside of Visual Studio 2010, a UI element in the Visual Studio context menu, and a series of PowerShell cmdlets. NuPack is a concerned with adding features to an existing application. For the most part, it automates the steps that developers take today to get a library into their source tree.
One key goal is that after installing a project into an application, the developer can commit changes to their source control repository, another developer can get latest, and continue to develop. For the most part, NuPack works with the source files for building a site, not the output of those files. Contrast this to a traditional package management system which is focused on automating the process of installing, upgrading, configuring, and removing software packages from a computer.
Open Source FTW!
Microsoft is no stranger to Open Source. There are so many great examples of Open Source in the Microsoft space like ASP.NET MVC, NerdDinner, the Silverlight Toolkit, and other releases that the ASP.NET team is working on. However while the source code for these projects is available to download, in most cases the projects are run and contributed by Microsoft staff. They’re just not the same as NuPack.
NuPack breaks some exciting ground and heralds a new era in open source and Microsoft. NuPack is the first collaborative effort between open source developers working side by side with Microsoft developers David Ebbo, David Fowler (and others) herded up by Phil Haack (with Scott Hanselman doing Jazz Hands) and Scott Guthrie as The Beaver. This is the first project where open source geeks like you and me can collaborate with softies on something that is core to the Microsoft development line, namely Visual Studio.

Package management for .NET is here. It’s cool (waaaaay cooler than double rainbows and even better than those oh so rehashed triple ones too). It’s integrated with Visual Studio in a variety of ways. Most of all, it’s drop dead easy, even for a simpleton like me.
Getting The Goods
Right now NuPack comes in the form of a Visual Studio Extension. Once you download it double click on the NuPack.Tools.vsix file and you’ll see something like this:

Note: You don’t need a specific flavor of Visual Studio 2010 here but the NuPack extensions only works with Visual Studio 2010. I’m just kind of an “ultimate” sorta guy.
Click Install and the extension will be added to Visual Studio 2010. Restart any Visual Studio instances you have running. Once Visual Studio restarts, click on Tools > Extension Manager and you should see NuPack Tools installed:

NuPack comes in three forms of entertainment for your development pleasure. A special Visual Studio console window (NuPack Console) where you use PowerShell to interact with NuPack, a command line tool, and a GUI built right into Visual Studio.
NuPack Console
The NuPack Console is an alternate way to access the package management system instead of the Package Manager Gallery UI. The NuPack Console is exposed as a tool window inside of Visual Studio and uses PowerShell cmdlets to access the same features that the GUI does.

Just type in the cmdlet name to add packages to solutions, install new packages, and getting lists of packages. The package manager console is a quick way to buff your project up with third party solutions quickly.
Check out the Package Manager Console Command reference here on the wiki.
Visual Studio Integration
If you’re not hip on using PowerShell and do the gooey thing then there’s integration too. Right click on the References folder in a project and you’ll see this:

Hey. Add Package Reference is sort of new, isn’t it? Click on it and you’ll see something like this:

Packages are the basic building blocks of NuPack and are made up of all the files that will get installed when you a add a package to a solution (assemblies, text files, scripts, etc.). It can also contain instructions to execute when the package is installed.
A package source is a place where you can find NuPack packages. We have a default one setup already that is included with NuPack so there’s nothing you need to do to use it. Once you install NuPack, you’ll have access to all the packages there.
If you’re looking to change the package source or adding your own (see information below about setting up your own) then inside of Visual Studio click on Tools > Options. After installing NuPack you’ll see a new node in the options tree, Package Manager. Under the General settings you can see a list of package sources. These are the sources that NuPack will look through to find packages and present them in the Gallery or via the List-Packages cmdlet.

From the gallery you can select a package and install it. It will immediately be added to the current solution. Any existing packages are listed here and you can remove or update them through the UI.
Command Line Junkies
Finally for those that just need to launch that command line you can use the nupack.exe console application. The nupack.exe is a console application that will create new packages for you. Just construct a manifest file (sample below on this), get the files together that you want to include in your package, and from the command line type “nupack.exe yourmanifestfile.nuspec”.
Here’s an example:

Under the Covers
NuPack is pretty basic in how it works. A package is created from two things:
- The contents of the package (assemblies, etc.)
- Meta data about the package
The meta data is a simple xml file with a .nuspec extension. For example here’s the .nuspec for MVCTurbine:
<?xml version="1.0" encoding="utf-8"?>
<package>
  <metadata>
    <id>MVCTurbine</id>
    <version>2.1</version>
    <authors>
      <author>Javier Lozano</author>
    </authors>
    <description>MVC Turbine is a plugin for ASP.NET MVC that has IoC baked in and auto-wires controllers, binders, view engines, http modules, etc. that reside within your application. Thus you worry more about what your application should do, rather than how it should do it.</description>
    <language>en-US</language>
  </metadata>
</package>
Very simple to create and includes some basic information like the author of the tool, a description, and the version number.
When a request is made to the package source, NuPack will find the contents of the package and do it’s magic adding it to your project and solution. How does it handle dependencies? Very similar to how RubyGems does using additional properties in the .nuspec file. Here’s the .nuspec for the Ninject adapter for MVCTurbine:
<?xml version="1.0" encoding="utf-8"?>
<package>
  <metadata>
    <id>MvcTurbine.Ninject</id>
    <version>2.1</version>
    <authors>
      <author>Javier Lozano</author>
    </authors>
    <description>Ninject support for MVC turbine.</description>
    <language>en-US</language>
  </metadata>
  <dependencies>
    <dependency id="MVCTurbine" version="2.1" />
    <dependency id="Ninject" version="2.0" />
  </dependencies>
</package>
As you can see, there is an additional node in the Xml file, dependencies. Each dependency has an id and a version. This is matched up to the <id> node in the original .nuspec for that package and if found, downloaded. So if you add MvcTurbine.Ninject to your project it will automatically locate and pull down MVCTurbine (in this case version 2.1) and Ninject. You don’t have to worry about hunting down all those dependencies because that what the creator of a package does for you. As a consumer, you just want to use a tool so the package manager takes care of that for you.
More information about the NuSpec File Format can be found here on the site.
DIY Package Management
Hey, want to run your own server? Knock yourself out. A package source can be any place where you get NuPack packages from. This can be as simple as a directory or network share.
- Setup a file share that everyone has read access to
- xcopy deploy a bunch of .nupkg files
- Install NuPack.vsix
- Point the package source at your share
- Hilarity ensues
Yes kids, you don’t need a WOPR computer to host your own packages. Just drop them on a file share and tell NuPack where to find them. No server needed (the package source can even just be as simple as “C:\My Amazing Packages That Are Going To Rule The World”).

Is it Evil?
Does NuPack solve world hunger? No. Does it address every concern every developer has around package management? Absolutely not. There are always going to be questions and problems and places to explore. There’s no such thing as a silver bullet (or the Easter bunny for that matter, sorry to burst that bubble). The difference is that the exploration doesn’t need to be done in a vacuum and Microsoft is committed to making this easy for you.
Transparency is a good thing, it lets us see things from different perspectives and we all know developers have more opinions than USB keys. The more eyes looking at something, the more opportunities there are to find flaws, course correct, and evolve the product to a better place.
For me, I will still continue to build gems for Nu while I’m building packages for NuPack. Think of NuPack as evolution. We deliberately named it “NuPack” to symbolize a sort of merging of some of the concepts of Nu and principles we hold with Nu, together with the package manager Microsoft started.
Along with the other team members, we’re contributing to the documentation effort for NuPack on the Wiki site and enhancing the features of the product so that new developers have a good, solid understanding of how this beast works and meeting the needs of managing third party dependencies.
Elsewhere in the Universe…
Go download it and install it. Now.
More information can be found on the CodePlex site about NuPack including:
- Getting Started Guide – Everything you always wanted to know about NuPack to start your day
- Frequently Asked Questions – Well, every project has to have one of these don’t they?
- Creating a Package – Start building yours today!
- Becoming a Core Contributor – Don’t like the way NuPack works or want to dive in and help out, here’s how to join the team
- Discussion Forums – Come by and chat about NuPack, talk to the team and see what we’ve been chatting about, and propose new ideas and suggestions
- Issue Tracker – The team keeps on top of issues and features, why not vote some up or suggest new ones?
Other blog posts about the NuPack announcement:
While this project started as a pure Microsoft one, it quickly broke new ground in letting blokes like me in to contribute directly to the codebase. Let’s hope to see more Open Source projects from Microsoft like this in the future so that everyone can benefit and feel like they’re contributing to something value-add in the .NET universe.
This is just an overview of the features of NuPack. I’ll go into details about specific functions, building your own packages, running your own server, and exploring the source code tree in future posts.
Okay, no lasers in this post but it has almost everything else! Enjoy the new tool, go build some packages, and keep on challenging yourself!
-
Getting Started with PowerConsole
Visual Studio 2010 is quite an improvement over it’s predecessors in many areas. Extensions for Visual Studio is a big thing and gives you the ability to install simple add-ons that interact and work with your solutions and projects, right from within the IDE. If you’re a tool author and haven’t looked into creating your own extensions you should check out this link to get started.
Here’s a funky little extension called PowerConsole that was written by Jianchun Xu at Microsoft. It’s a PowerShell console window that lives inside of the Visual Studio. Rather than just being a dumb shell, it actually ties into the Visual Studio DTE [explain]. This allows you to access parts of Visual Studio itself like your solution, project, files and even code.
First you’ll need to install the console into Visual Sudio. To do this, select Tools > Extension Manager… from the main menu:

Once the Extension Manager dialog appears, select Online Gallery from the left hand navigation:

Enter “powerconsole” in the search box and select PowerConsole from the search results:

Click on the Download button then click Install when the dialog appears:

Some extensions need you to restart Visual Studio after they’re installed. This is one of them. Click on Restart and Visual Studio will shut down and start up again:

Once Visual Studio is restarted you’ll have a new window you can open. A PowerConsole window! Click on View > Other Windows > Power Console (or press Ctrl+W then Ctrl+V) to open it:

Now the fun begins!

With PowerConsole you have access to some of the Visual Studio parts. There’s a built-in variable created for you when PowerConsole loads. Type “$dte” in the PowerConsole and press enter and you’ll see something like this.

$dte is the Microsoft Visual Studio object that will give you access to parts of the system, including your own solutions and files.
Now lets load up a solution to play around with. Here’s a blank ASP.NET MVC 2 app. There are a lot of great things you can do with the $dte variable.
$dte.Solution gives you access to the current solution itself:

Which you can then parse out and extract say the name of each project and it’s type:

The PowerShell Get-Member cmdlet will list all the methods and properties you can access in the $dte object:

How about displaying what edition of Visual Studio you’re running?

This is just a sliver of what this add-on can do. You also get full Intellisense to your files and any cmdlets you install and there’s extensibility too. There are a ton of things you can do with this and all it takes is a little scripting and some imagination!
Check out the PowerConsole site here and give it a try today.
-
Name that WSP - SharePoint Developer Tricks with WSPBuilder
One of my favorite tools that I highly recommend next to breathing is WSPBuilder. With this tool in your arsenal, no longer do you have to worry about hand crafting manifest files or running cryptic makecab.exe command line tools. Building solution packages for SharePoint can be a super big problem, and for super big problems we turn to WSPBuilder to save the day!
WSPBuilder comes in the form of a command line tool that you can run against a specific directory structure on your hard drive where your solution files live. It scans the folder and out pops a WSP file you can easily install onto SharePoint (make your life even easier by using the SharePoint Solution Installer so you can automatically deploy and activate your features!). While the command line tool is easy, the Visual Studio Plugin is even easier and useful. This is an integrated tool to Visual Studio that will allow you to build and deploy your solution from inside your IDE.
The default settings are fine but for example the WPS filename is the same as your project name. Personally I like using the CompanyName.Department.Project nomenclature when naming my artifacts (Features, WSP Files, Assemblies, etc.). This way I can easily identify them in the GAC and folder trees. So the default name just won't do for me and I don't care to rename my solutions or projects into fully qualified names, I just want my output files this way.
To override the default settings in WSPBuilder from inside the IDE is easy. Just create an xml file (Project > Add New Item > XML File) in your project named WSPBuilder.exe.config. Drop a copy of the contents from where WSPBuilder is installed (by default the IDE uses C:\Program Files (x86)\WSPTools\WSPBuilderExtensions) into this file and make the changes you want. For example to change the output name just add the key name WSPName and set the value to whatever you want:
<add key="WSPName" value="MyCompany.MyProject.wsp"/>
Now when you right click on your project and select WSPBuilder > Build WSP, it uses the local config file. You can set any other values you want to override from the default here as well. Hope that helps!
If you don't have WSPBuilder in your toolbelt, check it out today!
-
SharePoint Designer, Free as in Beer
 I caught a couple of blog posts from here and here that had to make me do a double take. I’m not one for relaying gossip, but this information seems to be legit. As of April 1, 2009 SharePoint Designer will be free. Now if you go to the “official” site there’s no mention of it however I’m hearing through the grapevine it’s true. The official site even has a “buy it today” option, so you might want to hold off on that.
Of course April 1st is always a fun time for me and the blog-o-sphere so the fact this announcement is targeted for that particular date has to make you think. Like I said, every indication I have says it’s true. It’s a wee bit confusing because David McNamee mentioned it in Michael Ganotti's Webcast saying it would be available in April for free from the MS Download site, and the next version will be free for people who purchase the next version of SharePoint. Huh? To me that doesn’t mean “free” but rather “buy one, get one free”.
In any case watch the skies and keep an eye out on April 1st for the download. This doesn’t mean it’s killing off SharePoint Designer like it did with FoxPro. Rather just making it more accessible for everyone and hey, the more tools the better right?
-
Setting up Windows Live Writer with weblogs.asp.net
Just a quick tip on anyone setting up the latest version of Windows Live Writer (14.0.8064.206) and publishing to http://weblogs.asp.net.
By default, when you run the wizard it’ll stumble over the the autodetection so you’ll have to select your blog provider manually. Here’s the default selection when choosing Community Server:

Note the remote posting URL. The default value is incorrect (probably because weblogs.asp.net is a subdomain). Entering http://weblogs.asp.net/blogs/metablog.ashx will result in an error and you might be left scratching your head why you can’t publish your blog.
The proper URL should be http://weblogs.asp.net/metablog.ashx like so:

Just thought I would pass this tip along in case anyone was having problems getting connected.
-
Goodbye PDA, It's Been Nice Knowing Ya
I'm ditching my PDA (currently a BlackBerry Curve) and my laptop for note taking and going retro.
For the past few years I've been taking notes in various digital media. Back when I had my Palm, I would do handwritten notes (sometimes trying to fight that silly PalmScript recognizer). When I had a tablet available, I would do the same in OneNote and recently I just fill up OneNote pages with notes and scribbles (all typed in). The biggest issue I have with digital note taking is, while it's fast on data entry, it's horrible in capturing intent and nuances of information.
Recently I got inspired by a concept Mike Rhodes seems to have earmarked back in 2007 called "sketchnotes". It's the idea of capturing hand-written notes in a book, much like how you would scribble notes in class if you were that sort of person, adding in images and enhancing the notes with fonts and flair. I remember those days as I would use my sketch book for pretty much all notes rather than a traditional lined book (I went to a Vocational Art School so 70% of my classes were art based and thus I had dozens of sketchbooks for use throughout the year).
Sketchnotes are just like those days of taking notes in art class, except now I use them in corporate meetings, conferences, and impromptu get togethers at user group sessions, code camps, etc. They're much easier to lug around than a laptop (although I usually always have my laptop handy) but the best thing is they're easier to get started (it's like having a solid-state drive) and require no batteries!
The best part of sketchnotes is that you tend to flow free with the information and really focus on what's being said as you translate it into something more meaningful than just words on a page. Changing fonts is much faster than on the computer (and I can invent fonts on the fly) along with bits of flair (borders, highlighting, shadows, etc.) that punch out a concept. It's a slower process than capturing brain dumps onto OneNote and typing in information, but it lets me be more creative (something I've been lacking in the last few decades) and helps me understand the concepts that were being presented or talked about. It's also like having a whiteboard hovering around with you all the time as I can quickly do a screen mockup as the customer might be describing his/her needs which I can then just turn around and show to them "Do you mean something like this?". Fast feedback cycle, I like that.
Here's an image from my current sketchnotebook (taken from the ALT.NET Open Spaces Conference in Calgary a few months ago):
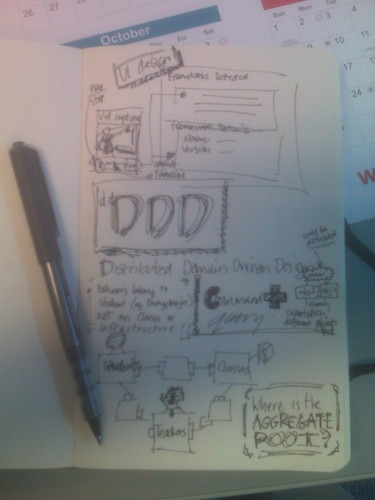
The image is from my CrackBerry so not very clear. I'll be creating a new Flickr pool and uploading higher quality images as I get them scanned.
My weapons of choice are the unlined large size (5"x9") Moleskin plain soft notebook and a black Uni-Ball Vision Micro Roller Pen. The Uni-Ball bleeds ever so slightly to get that "homemade" effect (something that's missed in digital) and lets me be free with the note taking, not worring about erasing (since you can't do it anyway). Moleskine rocks and while they're more pricier than other books, they hold up under stress (and come with a cardboard holder in case I have some handout to stash).
Yes kids, you can do something like this with OneNote and a tablet PC but a) I don't always have a tablet PC b) I find my OneNote notes turn into a graveyard of information that's always being sorted and never being used and c) I still need batteries to run OneNote (not to mention an OS that takes a few minutes to boot up). I'm not saying abandon your tablets and Moleskine is king (not that anyone would listen to me anywho). I use this as an alternative and like it, but YMMV.
Anyways while it might not be a new concept for you, it's something I've been trying to get into lately and now I'm comfortable doing on a regular basis. It took a few false starts and weeks of practice to get back to scribing (and my hand still cramps up from time to time as I have to switch back and forth between paper and keyboard). Sometimes the notes are pure chicken scratch and I have a hard time deciphering them but it's the imagery and little things that make it work for me. They say a picture is worth a thousand words and I believe it. I feel like a giddy school girl again, scribbling images madly that remind me of School House Rock (and we *all* know how cool SHR is).
So goodbye digital input, it's been nice. Hand writing is back for me and it's here to stay. Maybe give it a try yourself?
-
Transforming Tree Surgeon using the Adaptive Console Framework
I'm a command line app junkie as I love working with it. I guess it's my DOS/Linux roots but I find things go faster when you're not dealing with a GUI and a mouse. Command line tools like NAnt and MSBuild have all sorts of options and syntax. Some of it discoverable, some of it not so much. NAnt for example will try to find a buildfile to run and execute it. It also will display the name and version of the app (which is useful in build logs so you know what's going on). There are other things like trying to find out how to run a command line tool. For example if you type "nant /?" you'll get this:
NAnt 0.86 (Build 0.86.3075.0; nightly; 02/06/2008)
Copyright (C) 2001-2008 Gerry Shaw
http://nant.sourceforge.netUnknown argument '/?'
Try 'nant -help' for more information
Entering the proper syntax of "nant -help" displays this:
NAnt 0.86 (Build 0.86.3075.0; nightly; 02/06/2008)
Copyright (C) 2001-2008 Gerry Shaw
http://nant.sourceforge.netNAnt comes with ABSOLUTELY NO WARRANTY.
This is free software, and you are welcome to redistribute it under certain
conditions set out by the GNU General Public License. A copy of the license
is available in the distribution package and from the NAnt web site.Usage : NAnt [options] <target> <target> ...
Options :-t[argetframework]:<text> Specifies the framework to target
-defaultframework:<text> Specifies the framework to target (Short format: /k)
-buildfile:<text> Use given buildfile (Short format: /f)
-v[erbose][+|-] Displays more information during build process
-debug[+|-] Displays debug information during build process-q[uiet][+|-] Displays only error or warning messages during
build process
-e[macs][+|-] Produce logging information without adornments
-find[+|-] Search parent directories for build file
-indent:<number> Indentation level of build output
-D:<name>=<value> Use value for given property
-logger:<text> Use given type as logger
-l[ogfile]:<filename> Use value as name of log output file
-listener:<text> Add an instance of class as a project listener
-ext[ension]:<text> Load NAnt extensions from the specified assembly
-projecthelp[+|-] Prints project help information
-nologo[+|-] Suppresses display of the logo banner
-h[elp][+|-] Prints this message
@<file> Insert command-line settings from a text file.A file ending in .build will be used if no buildfile is specified.
A lot of options there but pretty standard fare for a console application. And a lot of work to parse the options, validate them, display help messages, etc. I had a link to this thing called the Adaptive Console Framework sitting in my Action folder in Outlook and finally got around to looking at it. It's a library by Sunny Chen that takes the pain of command line junk by doing most of the heavy lifiting for you.
This is what the console framework provides for you. A nice, simple way of not having to write a lot of code to deal with complex command line options and something that gives you a few other benefits along the way like automatic help text generation and easy access to command line options. Notice that the syntax for displaying NAnt help was "nant -help" but it wouldn't allow variations like "nant /?" or "nant -?". The framework as we'll see let's us make it easy to just add variations to command line syntax without doing a lot of work.
The framework is a little gem of a library that I didn't think much about before but now after spending an entire hour of my hard earned time I think it's pretty slick. Here's a transformation of the console version of Tree Surgeon.
The old version of the Tree Surgeon console (betcha didn't even think there was one!) was a little boring and actually broken. If you ran it without any arguments you got this:
TreeSurgeon version 1.1
Copyright (C) 2007 - 2008 Bil Simser
Copyright (C) 2005 - 2006 Mike Roberts, ThoughtWorks, IncCreates a .NET Development tree
TreeSurgeon projectName
Please note - project name must not contain spaces. We recommend you use CamelCase for project names.
You could probably surmise you need to provide a project name at least. But what about those other options like version and what unit test framework to use? And frankly this is wrong since it's not version 1.1, this output was from the 2.0 version. Lots of little problems here.
Here's the source for the command line runner:
[STAThread]
private static int Main(string[] args)
{
try
{
return RunApp(args);
}
catch (Exception e)
{
Console.WriteLine("Unhandled Exception thrown. Details follow: ");
Console.WriteLine(e.Message);
Console.WriteLine(e.StackTrace);
return -1;
}
}
And here's the RunApp method:
private static int RunApp(string[] args)
{
Console.WriteLine("TreeSurgeon version 1.1");
Console.WriteLine("Copyright (C) 2007 - 2008 Bil Simser");
Console.WriteLine("Copyright (C) 2005 - 2006 Mike Roberts, ThoughtWorks, Inc");
Console.WriteLine();
if (args.Length != 2)
{
Usage();
return -1;
}
Console.WriteLine("Starting Tree Generation for " + args[0]);
Console.WriteLine();
string outputDirectory = new TreeSurgeonFrontEnd(
Path.GetDirectoryName(Assembly.GetExecutingAssembly().Location), args[1]).
GenerateDevelopmentTree(args[0], "NUnit");
Console.WriteLine("Tree Generation complete. Files can be found at " + outputDirectory);
return 0;
}
RunApp would output the logo and copyright info and give you the ugly Usage() message (which wasn't too useful) if you didn't pass in at least a project name. You could pass in a version to build (2003, 2005, or 2008) but the unit test framework was hard coded to NUnit. Like I said, not too useful.
After taking a quick glance at what the Adaptive Console Framework (ACF) could do I decided to transform the Tree Surgeon console runner using it and see what we could get.
The ACF basically has two steps to it (this is overly simplifying it but you'll see it's pretty easy). First you make a slight adjustment to your main console application method, then you get down and dirty by creating option contracts (via attributes, classes, and properties). This has a big bonus that I immediately saw which was to move the command line options into a separate assembly and class which meant I could test it without actualy having to run the application and secondly it would take care of most of the heavy lifting of dealing with command line syntax.
So the first thing I did was to ditch that RunApp method and replace the call to have the ConsoleApplicationManager class from the ACF do my work. Here's the updated Main method from the Tree Surgeon console app:
[STAThread]
private static void Main(string[] args)
{
try
{
ConsoleApplicationManager.RunApplication(args);
}
catch (Exception e)
{
Console.WriteLine("Unhandled Exception thrown. Details follow:");
Console.WriteLine(e.Message);
Console.WriteLine(e.StackTrace);
}
}
Next I created a new assembly (called TreeSurgeonConsoleApplication.dll) and added an app.config file to the console app so the ACF could find my option contracts and added a reference to the ACF assembly. Here's the newly added app.config file:
<?xml version="1.0" encoding="utf-8" ?>
<configuration>
<configSections>
<section name="AdaptiveConsole"
type="AdaptiveConsole.Config.AdaptiveConsoleConfigHandler, AdaptiveConsole"/>
</configSections>
<AdaptiveConsole provider="TreeSurgeonConsoleApplication.TreeSurgeon, TreeSurgeonConsoleApplication"
contractRepository="TreeSurgeonConsoleApplication"/>
</configuration>
The app.config file just tells the ACF two things. The name and location of my console provider and the assembly where to find the option contracts. That was all I had to do in my TreeSurgeonConsole project so after removing the reference to the Core project (where the actual Tree Generation would happen) I closed down the console app project. Thinking about it, with the app.config file you could really use a generic console application project for *any* console app since there's nothing specific in here anymore. Nice.
The console provider is a class derived from ConsoleApplicationBase in the ACF and has two string overrides you provide, a logo and a description. Here's the TreeSurgeon class that we just specified in our app.config file:
public class TreeSurgeon : ConsoleApplicationBase
{
public TreeSurgeon(string[] args) : base(args)
{
}
protected override string Logo
{
get
{
var sb = new StringBuilder();
sb.AppendFormat("TreeSurgeon version 2.0{0}", Environment.NewLine);
sb.AppendFormat("Copyright (C) 2007 - 2008 Bil Simser{0}", Environment.NewLine);
sb.Append("Copyright (C) 2005 - 2006 Mike Roberts, ThoughtWorks, Inc.");
return sb.ToString();
}
}
protected override string Description
{
get { return "Creates a .NET development tree"; }
}
}
We're emulating part of the old RunApp method here. When I run the console app now I get this:
TreeSurgeon version 2.0
Copyright (C) 2007 - 2008 Bil Simser
Copyright (C) 2005 - 2006 Mike Roberts, ThoughtWorks, Inc.Creates a .NET development tree
Looks pretty much the same however like I said, I can now test the TreeSurgeon class (for example make sure the logo is set correctly because I might decide down the road to make the property a little more dynamic like fetching values using Reflection). I'm also not actually running anything yet so if I was building my app using TDD this fits nicely with that approach.
That's it for this part of the conversion but like I said, I don't have it running my TreeSurgeonFrontEnd class yet or generating the development tree or verifying the command line or displaying help. That now comes with our options.
With the ACF you define your command line options through something called "Option Contracts". There are four types in the ACF: None, Exact, Patternized, and Free. For Tree Surgeon I want the user to be able to run the application using these options:
-
Display help if the user enters nothing
-
Provide the name of the project to generate (required)
-
Provide an optional version of the system to generate (with a default)
-
Provide an optional unit test framework to use (with a default)
We'll only look at the None Contract and the Patternized contract types.
The None Contract is a class that you inherit from OptionContractBase. It will be executed if the user provides no command line arguments to the application. Create a class that derives from OptionContractBase in your contract assembly. Here's the None contract for Tree Surgeon:
[OptionContract(
Type = ContractType.None,
Description = "Prints the help information on the screen.")]
public class TreeSurgeonEmptyContract : OptionContractBase
{
public override void Execute(
ConsoleApplicationBase consoleApplication,
IList<ArgumentInfo> args)
{
consoleApplication.PrintHelpMessage();
}
}
The class is decorated with an OptionContractAttribute that let's you specify the type of contract (None, Exact, Free, Patternized) and a description. Note we haven't done anything anywhere else in the system (the app.config file is done, the console Main method is done, and the ConsoleApplicationBase class is baked). All we're doing is adding a new class to the assembly we specified as our contractRepository in our app.config file.
Here's the output of the app now when no arguments are passed to it:
TreeSurgeon version 2.0
Copyright (C) 2007 - 2008 Bil Simser
Copyright (C) 2005 - 2006 Mike Roberts, ThoughtWorks, Inc.Creates a .NET development tree
> Calling the application without arguments
Prints the help information on the screen.Sweet. Now let's start adding our options for actually running the app.
We'll add a new class called TreeSurgeonCommandsContract (again derived from OptionContractBase). This time rather than specifying the type as "None" we'll use "Patternized". The Patternized type is a contract type where your console application requires a complex command line argument. You can define the options that are mandatory or not within the contract, you can define the options that carry a list of values and you can even define the switches in the patternized contracts. here's our TreeSurgeonCommandsContract class:
[OptionContract(
Type = ContractType.Patternized,
Description = "Generates a new .NET development tree for a given project name.")]
public class TreeSurgeonCommandsContract : OptionContractBase
The main thing we need to capture is the project name that we want to generate the tree for. We'll do this by creating a property (called ProjectName) and decorating it with the OptionAttribute:
[Option(
Type = OptionType.SingleValue,
Name = "/p;/project",
Required = true,
Description = "Specifies the project name.\r\n\t" +
"Please note - project name must not contain spaces.\r\n\t" +
"We recommend you use CamelCase for project names.")]
public string ProjectName { get; set; }
This tells the ACF that a) this option has a single value b) it's specified by either "/p:" or "/project:" and c) it's required. There's also a description we provide which will be displayed in our output that looks like this now:
TreeSurgeon version 2.0
Copyright (C) 2007 - 2008 Bil Simser
Copyright (C) 2005 - 2006 Mike Roberts, ThoughtWorks, Inc.Creates a .NET development tree
TreeSurgeonConsole.exe </p|/project:>
> Calling the application without arguments
Prints the help information on the screen.> Generates a new .NET development tree for a given project name.
/p|/project:value (required):
Specifies the project name.
Please note - project name must not contain spaces.
We recommend you use CamelCase for project names.Notice that we now have the application name (TreeSurgeonConsole.exe) along with a required property. And the help is displayed for that property. Again, pretty damn simple so far. At this point we could actually implement the required Execute method on the TreeSurgeonCommandsContract class and call out to our TreeSurgeonFrontEnd, passing it the ProjectName property. We would generate a developement tree just like the original system and we're done. However we're only about 20 minutes into our conversion so we can do a lot more.
First we'll add a property to specify the version of the development tree we want to generate. This is again just a string property in our TreeSurgeonCommandsContract class decorated with the OptionAttribute. We'll make this optional and provide a default value for it along with instructions:
[Option(
Type = OptionType.SingleValue,
Name = "/v;/version",
Required = false,
Default = "2008",
Description = "Specifies the Visual Studio version to generate.\r\n\t" +
"Valid options are: \"2003\", \"2005\", or \"2008\"\r\n\t" +
"Default is \"2008\"")]
public string Version { get; set; }
Then we'll do the same for our UnitTestFramework we want to specify (NUnit or MbUnit):
[Option(
Type = OptionType.SingleValue,
Name = "/t;/test",
Required = false,
Default = "NUnit",
CaseSensitive = true,
Description = "Specifies the Unit Test framework to use when generating the tree.\r\n\t" +
"Valid options are: \"NUnit\", or \"MbUnit\"\r\n\t" +
"Default is \"NUnit\"")]
public string UnitTestFramework { get; set; }
Now we can run our app and see the help the ACF is providing:
TreeSurgeon version 2.0
Copyright (C) 2007 - 2008 Bil Simser
Copyright (C) 2005 - 2006 Mike Roberts, ThoughtWorks, Inc.Creates a .NET development tree
TreeSurgeonConsole.exe </p|/project:> [/v|/version:] [/t|/test:]
> Calling the application without arguments
Prints the help information on the screen.> Generates a new .NET development tree for a given project name.
/p|/project:value (required):
Specifies the project name.
Please note - project name must not contain spaces.
We recommend you use CamelCase for project names./v|/version:value :
Specifies the Visual Studio version to generate.
Valid options are: "2003", "2005", or "2008"
Default is "2008"/t|/test:value :
Specifies the Unit Test framework to use when generating the tree.
Valid options are: "NUnit", or "MbUnit"
Default is "NUnit"Lots of great stuff here and all we've done was specify some attributes around a few properties. What I really like are a few things we got for free:
-
Our required parameters are specified here and included in the help message
-
Optional parameters are surrounded by "[xxx]" in our command line syntax display
-
We're able to add varations to our command line options ("/t" or "/test") just by specifying the values in the OptionAttribute
Now we'll actually implement the code to run our generator and use whatever values you pass along in the command line.
To get the framework to do our bidding, we implement the Execute method in our TreeSurgeonCommandsContract class. This method passes in a copy of the ConsoleApplicationBase class (we specified above as TreeSurgeon) and an IList of ArgumentInfo values which were passed into the application. This is more than just a string so we can get information from our arguments like what type of argument they are.
For Tree Surgeon, we need at least one option (the project name). We'll use a little LINQ to get the list of options from our passed in parameter and check to make sure that a) we have at least 1 option and b) we have a project name:
var options = from arg in args
where arg.Type == ArgumentType.Option
select arg;
if(options.Count() < 1 || string.IsNullOrEmpty(ProjectName))
{
consoleApplication.PrintHelpMessage();
return;
}
Now that we've got a valid command line we'll reproduce what our old RunApp method did, namely invoke the TreeSurgeonFrontEnd class which will generate our development tree for us. We'll make it a little more interesting than version 1.1 and print out a little more information on what options we're using to generate the tree. Here's our Execute method so far:
public override void Execute(ConsoleApplicationBase consoleApplication, IList<ArgumentInfo> args)
{
var options = from arg in args
where arg.Type == ArgumentType.Option
select arg;
if(options.Count() < 1 || string.IsNullOrEmpty(ProjectName))
{
consoleApplication.PrintHelpMessage();
return;
}
consoleApplication.PrintLogo();
Console.WriteLine("Starting Tree Generation{0}", Environment.NewLine);
Console.WriteLine(" Project Name: \"{0}\"", ProjectName);
Console.WriteLine(" Version: \"{0}\"", Version);
Console.WriteLine("Unit Test Framework: \"{0}\"", UnitTestFramework);
Console.WriteLine();
var frontEnd = new TreeSurgeonFrontEnd(Path.GetDirectoryName(Assembly.GetExecutingAssembly().Location), Version);
var outputDirectory = frontEnd.GenerateDevelopmentTree(ProjectName, UnitTestFramework);
Console.WriteLine("Tree Generation complete.{0}{0}Files can be found at:{0}\"{1}\"", Environment.NewLine, outputDirectory);
}
And here's the output using the command line "treesurgeonconsole.exe /p:test":
TreeSurgeon version 2.0
Copyright (C) 2007 - 2008 Bil Simser
Copyright (C) 2005 - 2006 Mike Roberts, ThoughtWorks, Inc.Creates a .NET development tree
Starting Tree Generation
Project Name: "test"
Version: "2008"
Unit Test Framework: "NUnit"Tree Generation complete.
Files can be found at:
"C:\Documents and Settings\simserb\My Documents\TreeSurgeon\test"Wait! We're only 45 minutes into our conversion and there's more features we can take on. Most apps let you turn off the silly logo/copyright info (usually with a "/nologo" switch). The ACF has a nice feature to specify switches on properties. You just add a boolean property to your class and decorate accordingly. Here's our "/nologo" switch:
[Option(
Type = OptionType.Switch,
Name = "/nologo",
Description = "When turned on, the logo and description\r\n\t" +
"information will not be displayed.")]
public bool NoLogo { get; set; }
Now that we have a bool property if the user adds "/nologo" to the command line we should not print out the header info:
if(!NoLogo)
{
consoleApplication.PrintLogo();
}
Finally one last thing before we're done. A bug in the old system was that if you tried to generate a new tree over top of an existing directory, it would bomb out with something like this:
TreeSurgeon version 1.1
Copyright (C) 2007 - 2008 Bil Simser
Copyright (C) 2005 - 2006 Mike Roberts, ThoughtWorks, IncStarting Tree Generation for test
Unhandled Exception thrown. Details follow:
Can't generate directory [C:\Documents and Settings\simserb\My Documents\TreeSurgeon\test] since it already exists on disk. Wait until a later version, or delete the existing directory!
at ThoughtWorks.TreeSurgeon.Core.SimpleDirectoryBuilder.CreateDirectory(String directoryName) in C:\Development\TreeSurgeon-2_0_0_0.source\src\Core\SimpleDirectoryBuilder.cs:line 12
at ThoughtWorks.TreeSurgeon.Core.TreeSurgeonFrontEnd.GenerateDevelopmentTree(String projectName, String unitTestName) in C:\Development\TreeSurgeon-2_0_0_0.source\src\Core\TreeSurgeonFrontEnd.cs:line 42
at ThoughtWorks.TreeSurgeon.TreeSurgeonConsole.TreeSurgeonConsoleMain.RunApp(String[] args) in C:\Development\TreeSurgeon-2_0_0_0.source\src\TreeSurgeonConsole\TreeSurgeonConsoleMain.cs:line 44
at ThoughtWorks.TreeSurgeon.TreeSurgeonConsole.TreeSurgeonConsoleMain.Main(String[] args) in C:\Development\TreeSurgeon-2_0_0_0.source\src\TreeSurgeonConsole\TreeSurgeonConsoleMain.cs:line 15Highly useful. Let's add a new feature to our command line, an "/overwrite" swtich. It'll be just like the "/nologo" switch except that if it's specified, we'll delete the directory before we generate the tree:
[Option(
Type = OptionType.Switch,
Name = "/overwrite",
Description = "When turned on, any project with the same name\r\n\t" +
"will be deleted.")]
public bool Overwrite { get; set; }
And here's the updated tree generation code with the check to see if we should delete the output directory first:
var frontEnd = new TreeSurgeonFrontEnd(Path.GetDirectoryName(Assembly.GetExecutingAssembly().Location), Version);
if (Overwrite)
{
Directory.Delete(frontEnd.GetOutputPath(ProjectName), true);
}
var outputDirectory = frontEnd.GenerateDevelopmentTree(ProjectName, UnitTestFramework);
Console.WriteLine("Tree Generation complete.{0}{0}Files can be found at:{0}\"{1}\"", Environment.NewLine, outputDirectory);
That's it! In under 60 minutes we were able to totally transform the command line tool into something a little more robust and testable (and even add a new feature to fix an old bug). Now when we run the Tree Surgeon console app we get a rich descriptive help screen:
TreeSurgeon version 2.0
Copyright (C) 2007 - 2008 Bil Simser
Copyright (C) 2005 - 2006 Mike Roberts, ThoughtWorks, Inc.Creates a .NET development tree
TreeSurgeonConsole.exe </p|/project:> [/v|/version:] [/nologo] [/overwrite] [/t|/test:]
> Calling the application without arguments
Prints the help information on the screen.> Generates a new .NET development tree for a given project name.
/p|/project:value (required):
Specifies the project name.
Please note - project name must not contain spaces.
We recommend you use CamelCase for project names./v|/version:value :
Specifies the Visual Studio version to generate.
Valid options are: "2003", "2005", or "2008"
Default is "2008"[/nologo]:
When turned on, the logo and description
information will not be displayed.[/overwrite]:
When turned on, any project with the same name
will be deleted./t|/test:value :
Specifies the Unit Test framework to use when generating the tree.
Valid options are: "NUnit", or "MbUnit"
Default is "NUnit"A few benefits I got from this conversion:
-
Options can be specified in any order. In the original code args[0] was the project name and args[1] was the version number. Now the user can specify the project name anywhere
-
The old system would bomb out if we tried to overwrite an existing directory. It will still do that, but we now have an "/overwrite" option that was added using one property and 3 lines of code
-
A highly descriptive help message is displayed to the user so discoverabilyt of what options are available is now there and didn't cost me anything in formatting
-
Users can specify options using long names "/version" or short "/v". Also I could add a new variation just by updating the attribute
-
My options are now fully testable and I don't have to run the app or even mock or fake it out
-
I have a highly flexible command line runner that I can extend with ease
So, if you've got a console application sitting around you might want to give the ACF a spin and try it out. Or if you're building a new app take a look at it. It was low impact and high value for my investment and gave me a better end result that's now testable and easy to extend. You might find it useful like I did. Many thanks to Sunny Chen for putting this library together, it's a great tool.
Enjoy!
-
-
Terrarium, Terrarium, Terrarium
I'm presenting a talk around Terrarium development at the Edmonton .NET User Group on September 25th. The talk is focused on upgrading a legacy app (1.1) to 2.0 (and beyond to 3.5 eventually), building and running your own Terrarium (complete with man-eating critters), and the future roadmap.

Here's the session abstract:
Terrarium was created by members of the .NET Framework team in the .NET Framework 1.0 timeframe and was used initially as an internal test application. In Terrarium, you can create herbivores, carnivores, or plants and then introduce them into a peer-to-peer, networked ecosystem where they complete for survival. Terrarium demonstrates some of the features of the .NET Framework, including Windows Forms integration with DirectX; XML Web services; support for peer-to-peer networking; support for multiple programming languages; the capability to update smart client, or Windows-based, applications via a remote Web server; and the evidence-based and code access security infrastructure. This session is to explore the newly open sourced tool and talk about aspects and challenges around porting the 1.1 code to 2.0, introducing new framework features, updating the architecture. As well, we’ll look at building new creatures to introduce to your terrarium; how the entire eco-system works from a developers perspective, and the future roadmap where the Terrarium community is going.
I'll also be presenting the same session to the Calgary .NET User Group, we're just finalizing a date. See you there!
Update: The Calgary .NET User Group presentation is confirmed for October 1st. Details can be found here on their site. The talk will be titled "The interaction of feeding and mating in the software development control of a Terrarium".
-
Microsoft StyleCop, Totalitarian Rules
I got turned onto a fairly new tool by a friend and was interested in checking it out. It's called Microsoft StyleCop and done in the style of FxCop but rather than analyzing assemblies it looks at code for formatting and style rules.
The original use was within Microsoft for keeping code across all teams consistent. Imagine having to deal with hundreds of developers moving around an organization like Microsoft where there are dozens of major teams (Windows, Office, Visual Studio, Games, etc.) and millions of lines of code. It helps if the code is consistent in style so people moving between teams don't have to re-learn how the "style" of that new team works. Makes sense and I can see where there's benefit, even in smaller organizations.
As an example, here's a small User Interface utility class for long(ish) running operations. It's simple but works and is easy to use:
using System;
using System.Windows.Forms;
namespace UserInterface.Common
{/// <summary>
/// Utility class used to display a wait cursor
/// while a long operation takes place and
/// guarantee that it will be removed on exit.
/// </summary>
/// <example>
/// using(new WaitCursor())
/// {
/// // long running operation goes here...
/// }
/// </example>
internal class WaitCursor : IDisposable
{private readonly Cursor _cursor;
public WaitCursor()
{_cursor = Cursor.Current;
Cursor.Current = Cursors.WaitCursor;
}
public void Dispose()
{Cursor.Current = _cursor;
}
}
}
One could even argue here that the class documentation header is somewhat excessive, but this is meant to be a framework class that any application could use and maybe deserves the <example/> tag.
Maybe it's my formatting style but I like using the underscore prefix for class fields. This is for two reasons. First, I don't have to use "this." all over the place (so the compile can tell between a parameter variable, local variable, and class variable. Secondly, I can immediately recognize that "_cursor" is a class wide variable. Sometimes we have a policy of only referencing variables via Properties so for example I could tell if this was a problem if I saw a method other than a getter/setter use this variable. The debate on underscore readability can be fought some other time, but for me it works.
After running StyleCop on this single file (I wasn't about to deal with all the voilations in the entire solution) it created this list of violations:
-
SA1600: The field must have a documentation header.
-
SA1600: The constructor must have a documentation header.
-
SA1600: The method must have a documentation header.
-
SA1633: The file has no header, the header Xml is invalid, or the header is not located at the top of the file.
-
SA1309: Field names must not start with an underscore.
-
SA1200: All using directives must be placed inside of the namespace.
-
SA1200: All using directives must be placed inside of the namespace.
-
SA1101: The call to _cursor must begin with the "this." prefix to indicate that the item is a member of this class.
-
SA1101: The call to _cursor must begin with the "this." prefix to indicate that the item is a member of this class.
Hmmm, that's a lot of problems for such a little file. Now grant you, when you run FxCop against any assembly (even Microsoft ones) you get a whack of "violations". They range from actual, real, critical errors that should be fixed, to annoyances like not enough members in a namespace. Any team using FxCop generally has to sift through all the violations and decide, as a team, what makes sense to enforce and what to ignore. StyleCop has similar capabilities through it's SourceAnalysisSettingsEditor program (buried in the Program Files directory where the tool is installed or via right-click on the Project you're performing analysis on). It allows rules to be ignored but it's pretty simplistic.
I think one of the biggest issues with the tool is the fact that it goes all Chef Ramsey on your ass, even if its code created by Microsoft in the first place. For example create a new WinForms project and run source analysis on it. You'll get 20+ errors (even if you ignore the .Designer generated file). You can exclude designer files and generated files through the settings of the tool, but still its extra work and more friction to use the tool this way. It might be debated that the boilerplate code Visual Studio generates for new files (which you can modify but again, more work) should conform to the StyleCop guidelines. After all Microsoft produced both tools. However this would probably anger the universe as the "new" boilerplate code would look different from the "old".
There are other niggly bits like the tool insisting on documenting private variables so pretty much every property, method, and variable (public, private, or otherwise) will all have at least an extra 3 lines added to it should you enforce this rule. More work, more noise.
I'm somewhat torn on the formatting issues here. What it suggests doesn't completely jive with me, but that might be style. After all, the tool is designed to provide consistency of code formatting across multiple disparate sources. However unless you're a company with *no* code and start with this tool, you'll probably be ignoring certain rules (or groups of rules) or doing a lot of work to try to bring your code to match the violations you'll stumble on. It's like writing unit tests after the fact. Unit tests are good, but writing them after the code is done (and even shipped) has a somewhat diminished cost to benefit ratio.
In getting this simple class up to snuff I had to not have the urge to hit Ctrl+Alt+F in ReSharper (ReSharper's default formatting totally blows the violations) and hold my nose on a few things (like scattering the code with "this." prefixes and seemingly redundant documentation headers). Documentation is a good thing but my spidey-sense has taught me that comments mean something might be wrong with the code (not descriptive enough, should have been refactored into a well-named method, etc.). It only took a few minutes to shuffle things around, but I look at large codebases that you could point this tool at and think of weeks of code reformatting and what a cost that would be.
In any case, here's the final class with the changes to "conform" to StyleCop's way of life:
//-----------------------------------------------------------------------// <copyright file="WaitCursor.cs" company="MyCompany">// Copyright MyCompany. All rights reserved.// </copyright>//-----------------------------------------------------------------------namespace UserInterface.Common
{using System;
using System.Windows.Forms;
/// <summary>
/// Utility class used to display a wait cursor
/// while a long operation takes place and
/// guarantee that it will be removed on exit.
/// </summary>
/// <example>
/// using(new WaitCursor())
/// {
/// // long running operation goes here...
/// }
/// </example>
internal class WaitCursor : IDisposable
{/// <summary>
/// Holds the cursor so it can be set on Dispose
/// </summary>
private readonly Cursor cursor;
/// <summary>
/// Default constructor
/// </summary>
public WaitCursor()
{this.cursor = Cursor.Current;
Cursor.Current = Cursors.WaitCursor;
}
/// <summary>
/// Resets the cursor back to it's previous state
/// </summary>
public void Dispose()
{Cursor.Current = this.cursor;
}
}
}
I feel this is a lot of noise. Sure, it could be consistent if all files were like this but readability is a funny thing. You want code to be readable and to me this last version (after StyleCop) is less readable than the first. Documenting default constructors? Pretty useless in any system. What more can you say except "Create an instance of <T>". Documenting private variables? Another nitpick but why should I? In this class you could probably rename it be _previousCursorStyle or something to be more descriptive and then what is documentation going to give me. Have I got anything extra from the tool as a result? I don't think so.
If it's all about consistency something we've done is to share a ReSharper reformatting file which tells R# how to format code (when you press Ctrl+Alt+F or choose Reformat Code from the ReSharper menu). It has let us do things like not wrap interface implementations in regions (regions are evil) and decide how our code should be formatted like curly braces, spacing, etc. However it completely doesn't match StyleCop in style or form. You could probably tweak ReSharper to match StyleCop "to a certain extent" but I disagree on certain rules that are baked into the tool.
For example take "this." having to prefix a variable. To me a file full of "this" prefixes is just more noise. ReSharper agrees with me because it flags "this.PropertyName" as redundant. Maybe the debate whether it's a parameter or a field is probably a non-issue. If a method is short, one can immediately identify the local variables and distinguish them from member fields and properties with a glance. If it is long, then there is probably a bigger issue than the code style: the method simply should be refactored. For whatever reason, Microsoft thinks "this." is important and more readable. Go figure.
Rules can be excluded but it's a binary operation. Currently StyleCop doesn't have any facility on differentiating between "errors" and "warnings" or "suggestions". Maybe it should but then with all the exclusions and errors->warnings you could configure, the value of the tool quickly diminishes. Enough errors being turned into warnings and you would have to argue the value of the tool at all, versus a ReSharper template.
In any case, feel free to try the tool out yourself. If you're starting with a brand new codebase and are willing to change your style to match a tool then this might work for you. For me, even with public frameworks I'm working on, the tool seems to be more regiment and rules than being fit for purpose. I suppose if you buy into the "All your StyleCop are belong to us" mentality, it'll go far for you.
For me it's just lots of extra noise that seems to provide little value but YMMV.
-
-
Tree Surgeon 2.0 Released
We’ve released version 2.0 of Tree Surgeon. This is the first major release since I took the project over from Mike Roberts.

This release adds the following features:
- 2005 and 2008 support in addition to the original 2003 support
- Ability to choose the unit test framework generated (NUnit or MbUnit)
- Updated tool resources to latest versions
- NAnt build scripts will use the appropriate .NET versions (1.1, 2.0 and 3.5)
- Minor bug fixes
- Improved User Interface
Please download the latest project files here. Source code, zip file, and installer are all available.


